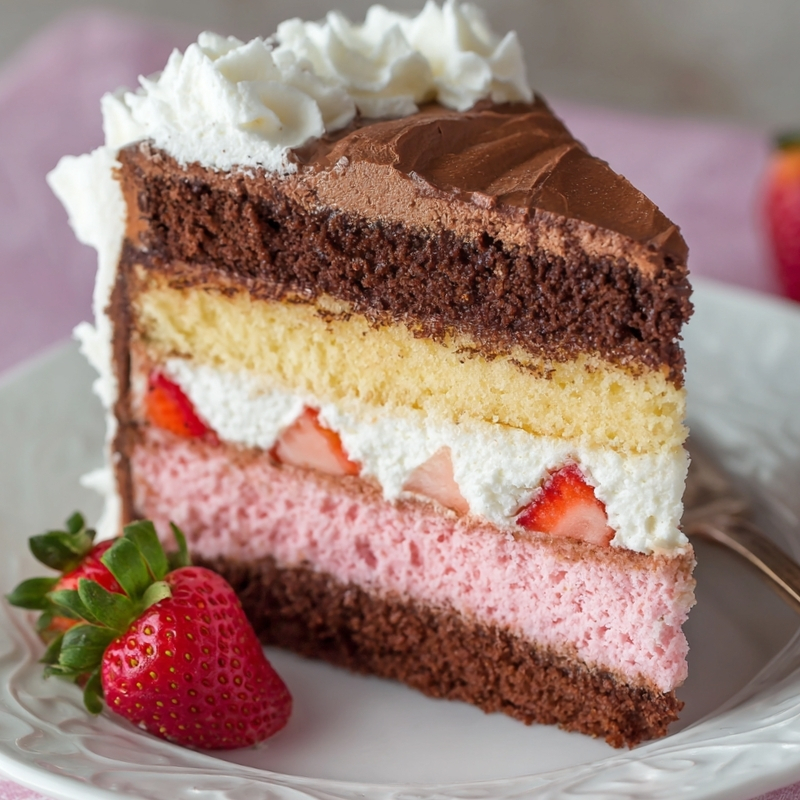
The park benches were still damp from the morning dew when I arrived with a basket tucked under my arm. It was one of those early spring gatherings where everyone brings something small, nothing too formal, just a reason to sit together and enjoy the season. A young mother nearby was helping her daughter arrange tiny paper decorations on the grass, and every now and then the little girl would glance over at my basket with quiet curiosity.
When I finally opened it, her eyes widened at the sight of colorful cakesicles—bright yellows, soft pinks, and little bunny faces peeking back. She walked over slowly, as if she didn’t want to disturb them, and asked if they were “real food or just for looking.”
I told her they were meant to be eaten, though I understood the confusion. They do have a way of looking more like decorations than desserts.
Later that afternoon, I found myself back in my kitchen, thinking about how much joy those small treats had brought to a simple gathering. I decided to make another batch, this time with a bit more patience in the decorating, letting each piece feel like its own little project.
There’s something satisfying about working with your hands in that way—mixing, shaping, adding small details one at a time. No rush, no pressure, just the quiet rhythm of it all.
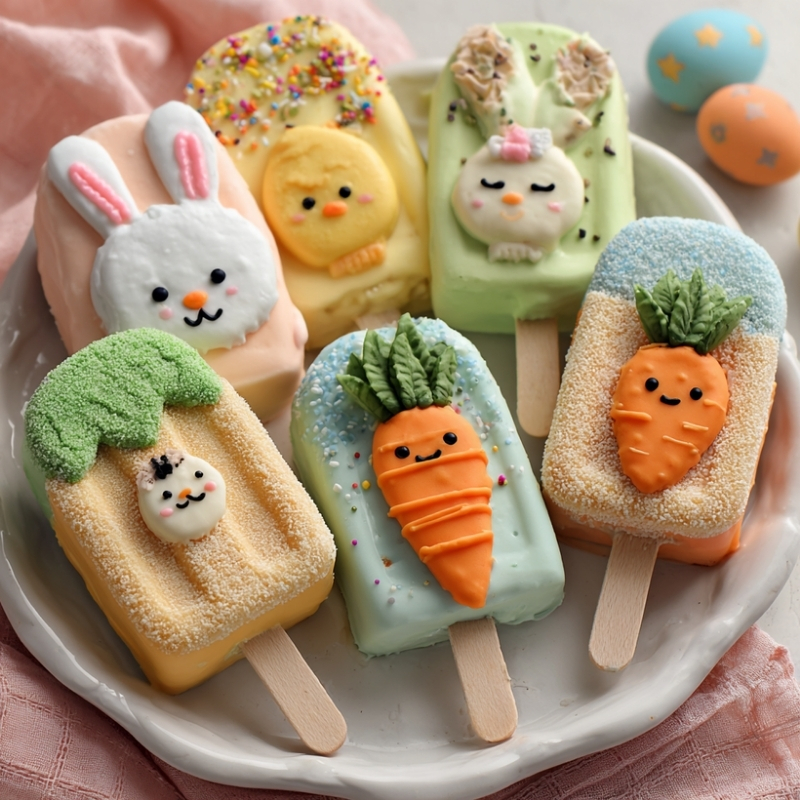
By the time I finished, the counter was filled with cheerful shapes—bunnies, chicks, and bright little carrots. My husband wandered in, took one look, and chuckled softly. “You’ve turned the kitchen into spring,” he said.
And in a small way, that’s exactly how it felt.
Short Description
These whimsical Easter cakesicles combine moist cake and frosting with a smooth candy coating, decorated in playful spring designs like bunnies, chicks, and carrots.
Key Ingredients
- Cake, baked and cooled
- Frosting (a few tablespoons)
- Candy melts (white, yellow, orange)
- Royal icing or additional candy melts (pink, white, green, yellow, black)
- Sprinkles
- Cadbury Mini Eggs (optional)
Tools Needed
- Cakesicle mold
- Popsicle sticks
- Microwave-safe bowls
- Rubber spatula
- Paintbrush or spoon
- Ziplock bags or piping bags
- Toothpick or scribe tool
- Parchment or wax paper
Cooking Instructions
Step 1: Melt the Candy Coating
Melt the candy melts according to package instructions until smooth. Stir gently to avoid bubbles, which can affect the finish.
Step 2: Coat the Molds
Spread a layer of melted chocolate inside each mold using a brush or spoon. Insert the popsicle stick while the coating is still soft, then let it set. Apply a second layer for a stronger shell.
Step 3: Prepare the Cake Filling
Crumble the cooled cake and mix with a few tablespoons of frosting until it forms a soft, moldable mixture. If it feels too dry, add a bit more frosting, one spoon at a time.
Step 4: Fill the Molds
Once the shell has hardened, press the cake mixture into each mold, leaving a small space at the top.
Step 5: Seal with Chocolate
Cover the filling with more melted chocolate, smoothing the surface. Let it set completely before removing.
Step 6: Remove from Mold
Gently release the cakesicles from the molds. If they resist, let them sit briefly at room temperature to loosen.
Step 7: Create Bunny Decorations
Pipe bunny ears and feet onto parchment paper using icing or melted chocolate and let them harden. Attach them to a white cakesicle using a small dab of chocolate. Add a pink nose, black eyes, and whiskers.
Step 8: Make Carrot Designs
Start with an orange-coated cakesicle and drizzle additional orange chocolate in thin lines. Add green chocolate at the top for leaves if desired.
Step 9: Decorate Baby Chicks
Use a yellow base and pipe small wings and a tuft on top. Add orange details for the beak and feet, adjusting with a toothpick if needed. Finish with tiny eyes.
Step 10: Finish with Spring Touches
Drizzle colored chocolate over cakesicles and add sprinkles while still wet. Let everything set completely before serving.
Why You’ll Love This Recipe
Creative and Fun: Each cakesicle can be decorated differently
Soft and Moist Interior: Cake and frosting create a tender texture
No Baking Required (if cake is pre-made): Saves time and effort
Perfect for Gatherings: Eye-catching and easy to serve
Kid-Friendly Activity: Great for little hands to help decorate
Mistakes to Avoid & Solutions
Shell Cracking
Apply two layers of chocolate to make a sturdier coating.
Cake Filling Too Dry
Add frosting gradually until the mixture holds together.
Chocolate Not Setting Properly
Chill briefly between steps to help it firm up.
Decorations Sliding Off
Let the base layer set slightly before adding details.
Overheating Candy Melts
Heat in short intervals and stir often to maintain smooth texture.
Serving and Pairing Suggestions
Arrange on a decorative tray for Easter gatherings
Pair with tea, milk, or light fruit drinks
Add to dessert tables for visual variety
Serve individually wrapped as party favors
Display upright in a foam base for a playful look
Storage and Reheating Tips
Refrigerator: Store in an airtight container for up to 5 days
Freezer: Freeze for up to 1 month, thaw in the fridge
Room Temperature: Keep in a cool place for short periods
Serving After Storage: Let sit for 10–15 minutes before serving
FAQs
1. Can I use store-bought cake?
Yes, it works perfectly and saves time.
2. Do I need a mold?
Molds help shape them, but you can form them by hand if needed.
3. Why is my chocolate uneven?
Spread slowly and tap the mold to remove air bubbles.
4. Can kids help with this recipe?
Yes, especially with decorating—it’s simple and fun.
5. Can I make them ahead of time?
Yes, they store well and can be made a day or two in advance.
Tips & Tricks
Use gel colors for vibrant shades without thinning chocolate
Work in small batches to keep chocolate smooth
Practice designs on parchment before decorating
Keep tools clean for neat details
Chill briefly between decorating steps
Recipe Variations
Chocolate-Coated Cakesicles
Use dark or milk chocolate instead of colored melts.
Creates a richer flavor with a simpler look.
Vanilla Sprinkle Cakesicles
Mix colorful sprinkles into the cake filling before shaping.
Adds texture and a playful bite.
Fruit-Flavored Cakesicles
Use strawberry or lemon cake with matching colored coating.
Offers a lighter, fresher taste.
Nutty Crunch Cakesicles
Add finely chopped nuts to the cake mixture.
Gives a subtle crunch and deeper flavor.
Final Thoughts
Later that evening, I packed a few of the finished cakesicles into a small box and left them on the kitchen table. By morning, a few had already disappeared, though no one felt the need to explain.
There’s a quiet kind of happiness in making something that invites people to pause, even for a moment. These cakesicles do that in their own gentle way.
They’re not complicated once you settle into the process. A bit of mixing, a bit of shaping, and then the simple pleasure of adding small details.
What stands out most isn’t the decoration or even the flavor, though both matter. It’s the feeling they bring when shared.
A small treat, made by hand, can shift the mood of a room without much effort at all.
And sometimes, that’s exactly what’s needed.

Easter Cakesicles
Ingredients
- Cake baked and cooled
- Frosting a few tablespoons
- Candy melts white, yellow, orange
- Royal icing or additional candy melts pink, white, green, yellow, black
- Sprinkles
- Cadbury Mini Eggs optional
Instructions
- Melt the candy melts until smooth, stirring gently to avoid air bubbles.
- Spread a thin layer inside each mold, insert the popsicle stick while soft, and let it set. Add a second layer for a sturdier shell.
- Crumble the cooled cake and mix with a few tablespoons of frosting until soft and moldable. Add more frosting gradually if needed.
- Press the cake mixture into the hardened shells, leaving a little space at the top.
- Cover with melted chocolate and smooth the surface. Let it set completely before removing.
- Gently release from the molds, letting them sit at room temperature briefly if they stick.
- Pipe bunny ears and feet onto parchment, let them harden, then attach with melted chocolate. Add a pink nose, eyes, and whiskers.
- For carrot designs, drizzle orange chocolate over an orange base and add green on top for leaves.
- For baby chicks, use a yellow base, pipe wings and a tuft, then add a beak, feet, and tiny eyes. Adjust details with a toothpick if needed.
- Finish by drizzling colored chocolate and adding sprinkles while wet. Let everything set before serving.