Back in the late ‘70s, when I first started teaching, our staff room was always filled with recipe cards passed hand to hand like precious secrets. We didn’t have Pinterest boards or Instagram videos, just worn-out index cards with smeared ink and smudges of chocolate or butter as proof that a recipe had been truly loved.
One spring, right before Easter break, our school librarian Marsha brought in a dessert that turned our quiet lunchroom into a chorus of forks scraping plates. It was simple, sweet, and so comforting. She called it “dump cake,” and that name made us all chuckle, but one bite, and nobody cared what it was called. The sweet cherries mingled with tart pineapple, the golden top crackled just enough, and there was butter in every bite.
Years later, when I retired and started baking full-time, that memory resurfaced while going through an old cookbook my mother gave me, full of handwritten notes. Tucked in the back was a nearly forgotten recipe that looked familiar.
I baked it that afternoon, and when I tasted the warm, bubbling filling under that crumbly top, it was like flipping open a yearbook. I’ve made a few gentle tweaks since then, but it’s still one of the easiest, most nostalgic desserts I know — a true crowd-pleaser that reminds me how beautiful simplicity can be.
Short Description
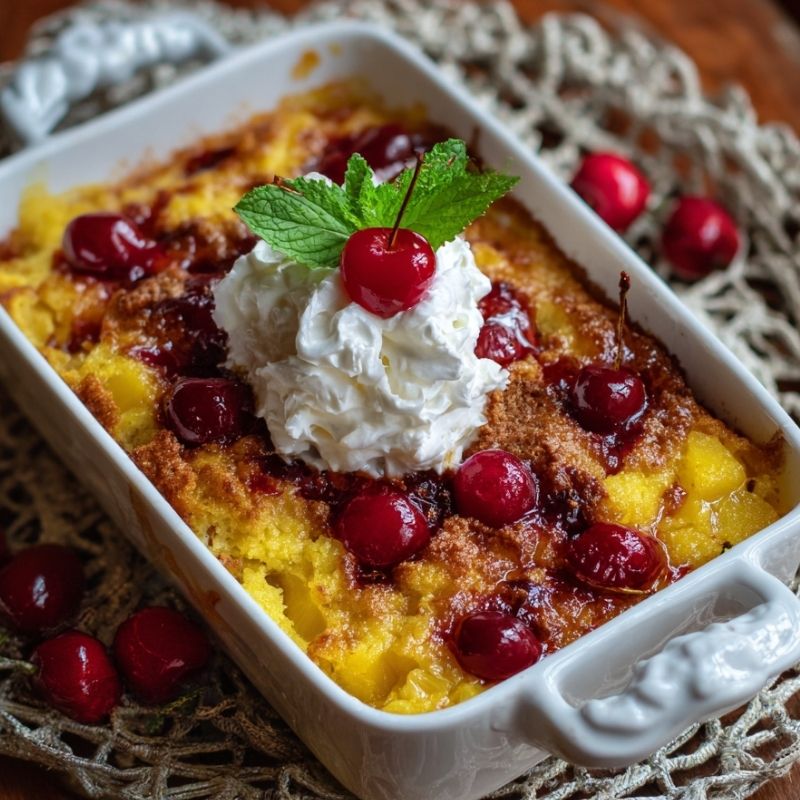
This Pineapple Cherry Dump Cake is a simple, foolproof dessert layered with sweet crushed pineapple, tart cherry pie filling, buttery yellow cake mix, and optional crunchy nuts—baked into golden, gooey perfection.
Key Ingredients
- 1 can (20 oz) crushed pineapple with juice
- 1 can (21 oz) cherry pie filling
- 1 box yellow cake mix
- ½ cup unsalted butter (1 stick), sliced into thin pats
- ½ cup chopped pecans or walnuts (optional for added crunch)
Tools Needed
- 9×13-inch baking dish
- Can opener
- Spatula or spoon
- Knife for slicing butter
- Oven
- Cooking spray or butter for greasing
Cooking Instructions
Step 1: Prepare Your Pan
Preheat your oven to 350°F (175°C). Lightly grease a 9×13-inch baking dish with butter or cooking spray. Make sure to get into the corners so nothing sticks.
Step 2: Layer the Pineapple
Open your can of crushed pineapple and pour the entire contents — juice and all — into the baking dish. Use a spoon to spread the fruit evenly along the bottom.
Step 3: Add the Cherry Layer
Spoon the cherry pie filling on top of the pineapple layer. Don’t stress about perfection. A bit of mixing is okay, the magic happens as it bakes.
Step 4: Top with Cake Mix
Sprinkle the dry yellow cake mix evenly over the fruit layers. Try to cover everything, but don’t stir it. Just let it sit like a soft blanket over the filling.
Step 5: Add Butter and Nuts
Place your butter pats across the entire surface. They’ll melt and help crisp the top. If using nuts, sprinkle them over now for a delightful crunch.
Step 6: Bake to Perfection
Bake for 45 to 50 minutes, or until the top is golden and you see bubbling around the edges. You may catch a delicious aroma drifting through your kitchen by the 30-minute mark.
Step 7: Cool and Serve
Let the cake rest for at least 15 minutes. This allows the layers to settle and prevents steam burns when serving.
Why You’ll Love This Recipe
Foolproof Favorite: No mixing bowls, no fuss. Just layer and bake.
Sweet & Tart Harmony: The pineapple and cherries balance each other beautifully, neither too sharp nor too sweet.
Golden Crunch: The buttery topping crisps up perfectly, offering contrast to the gooey filling.
Versatile Dessert: Great for holidays, potlucks, or weeknight indulgence.
Nostalgic Comfort: Old-school flavor that tastes like home, even if it’s your first time baking it.
Mistakes to Avoid & Solutions
Dry Spots in the Cake Mix:
Problem: Some areas may stay powdery if butter isn’t evenly distributed.
Solution: Make sure your butter pats are thin and spread across the entire top, or lightly drizzle 1–2 tablespoons of melted butter between gaps.
Overbaked Edges:
Problem: Fruit may bubble up and caramelize too much at the edges.
Solution: Check at the 40-minute mark. If your oven runs hot, cover the edges loosely with foil.
Soggy Center:
Problem: Fruit can cause the center to stay too soft.
Solution: Let it cool the full 15–20 minutes before serving, or even refrigerate it and reheat slices.
Crumbled Cake Mix Clumps:
Problem: If you use cold butter or dump all butter in one spot, dry patches and lumps form.
Solution: Always use room-temperature butter cut thinly, spaced out across the surface.
Serving and Pairing Suggestions
Best Served Warm: Enjoy it fresh out of the oven or gently reheated.
Top With: A scoop of vanilla ice cream, whipped cream, or even a dollop of Greek yogurt.
Perfect Pairings:
Drinks: Serve with hot tea, coffee, or a sparkling rosé.
Meals: Complements savory potlucks or after a light grilled dinner.
Style: Works beautifully as a plated dessert or scooped family-style into bowls.
Storage and Reheating Tips
Refrigerator: Store leftovers covered in the fridge for up to 4 days.
Freezing: You can freeze in individual portions for up to 2 months. Thaw overnight before reheating.
Reheating:
Microwave: 20–30 seconds for individual servings.
Oven: Warm at 300°F for 10–15 minutes to maintain texture.
Avoid: High heat or long microwave times, it’ll turn gummy.
FAQs
1. Can I make this ahead of time?
Yes! You can layer everything in the baking dish (except butter and nuts), cover, and refrigerate up to 24 hours. Add butter and nuts just before baking.
2. Can I use fresh fruit instead of canned?
Yes, but you’ll need to compensate with a bit of added juice or sugar. Use 2 cups of chopped pineapple and 2 cups of sweetened cherries, plus ½ cup pineapple juice.
3. Do I need to stir the cake mix into the fruit?
Nope! That’s the beauty of a dump cake. Just sprinkle and bake — the moisture from the fruit and butter will cook it perfectly.
4. What’s the best butter to use — salted or unsalted?
Unsalted is preferred so you can control the saltiness. If using salted, just skip adding any extra salt.
5. Can I make this gluten-free?
Absolutely! Swap the regular cake mix for your favorite gluten-free yellow cake mix: same quantity, same steps.
Tips & Tricks
Use a glass or ceramic baking dish for even heat distribution.
If you want extra crisp on top, broil the last 2 minutes — but keep a close eye!
Toast the nuts beforehand for deeper flavor.
Try mixing the pie filling with a teaspoon of almond extract for a bakery-style twist.
Let it rest fully before scooping — the filling will hold better, and the taste deepens as it cools.
For extra indulgence, sprinkle shredded coconut over the top before baking.
Recipe Variations
1. Tropical Coconut Twist
Add ½ cup shredded sweetened coconut over the cherry layer before adding cake mix.
Sprinkle a bit more coconut on top with the nuts.
The result is more tropical and slightly chewy.
2. Spiced Autumn Dump Cake
Use apple pie filling instead of cherry.
Add 1 tsp cinnamon and ¼ tsp nutmeg to the dry cake mix.
Great served with vanilla ice cream and a drizzle of caramel sauce.
3. Berry Medley Swap
Use mixed berry pie filling in place of cherry.
Add fresh blueberries to the pineapple layer.
Bright, colorful, and slightly tangy.
4. Chocolate Cherry Dump Cake
Swap yellow cake mix with chocolate cake mix.
Use only cherry pie filling (skip pineapple).
Top with dark chocolate chips before baking for a black forest-inspired dessert.
Final Thoughts
This Pineapple Cherry Dump Cake has a rare magic. It’s forgiving, fragrant, and never fails to bring people back for seconds. As someone who’s spent more hours grading essays than whisking batters, I find great peace in recipes like this. No stress. No overthinking. Just flavors that feel like home.
It’s not the fanciest dessert in the world, but it has heart. And in my kitchen, that matters more. When friends drop by, I know I can whip this up without panic. I always keep the ingredients in the pantry just in case. Give it a try, and you might find, as I did, that some of the most beloved dishes in life come from the simplest origins.
Pineapple Cherry Dump Cake
Print ThisIngredients
- 1 can (20 oz) crushed pineapple with juice
- 1 can (21 oz) cherry pie filling
- 1 box yellow cake mix
- ½ cup unsalted butter (1 stick), sliced into thin pats
- ½ cup chopped pecans or walnuts (optional for added crunch)
Instructions
Step 1: Prep the Pan
Preheat oven to 350°F (175°C). Lightly grease a 9×13-inch baking dish, making sure corners are coated.
Step 2: Add Pineapple
Pour the entire can of crushed pineapple with juice into the dish. Spread evenly.
Step 3: Layer Cherries
Spoon cherry pie filling over the pineapple. No need for perfect coverage.
Step 4: Add Cake Mix
Sprinkle dry yellow cake mix evenly on top. Don’t stir.
Step 5: Butter & Nuts
Place butter slices across the cake mix. Sprinkle nuts over, if using.
Step 6: Bake
Bake 45–50 minutes, until golden and bubbly at the edges.
Step 7: Cool & Serve
Let cool for 15 minutes before serving. Enjoy warm.