On the edge of our little town sits an old, creaky library that has always felt a bit magical to me. Years ago, before I retired, I would take my students there for story time. One October afternoon, the librarian, Mrs. Greer, told us a chilling folktale about a witch who baked “poison” pies—beautifully glazed apple pies that shimmered in the moonlight. Of course, it was only a story, but it stuck with me.
This year, as I unpacked the Halloween decorations with my grandkids, I saw a jar of black sugar in my pantry and instantly thought of that tale. I decided we’d bring the story to life, in the most deliciously harmless way, by making a spooky apple pie.
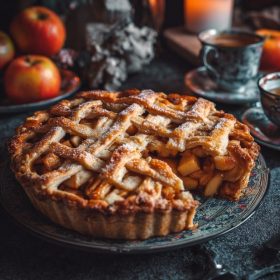
My grandchildren giggled at the idea of baking a “poison” pie and eagerly offered to slice apples and sprinkle sugar. We made it together in my kitchen, filling the house with the warm scent of cinnamon, nutmeg, and apples mingling in the oven. The black sugar sparkled on the crust, almost too pretty to eat, like a pie straight from a fairy tale.

Short Description
A festive twist on classic apple pie, this Halloween Poison Apple Pie combines tender cinnamon-spiced apples, buttery crust, and a dramatic sprinkle of black sugar for an enchanting holiday dessert.
Key Ingredients
- 1 package refrigerated pie crusts
- 6 cups sliced apples (Granny Smith or Honeycrisp work best)
- ½ cup sugar
- ¼ cup brown sugar
- 1 tsp ground cinnamon
- ¼ tsp ground nutmeg
- 1 tbsp lemon juice
- 1 tbsp cornstarch
- Black sugar, for sprinkling
Tools Needed
- 9-inch pie dish
- Large mixing bowl
- Wooden spoon or spatula
- Paring knife and cutting board
- Pastry brush
- Cooling rack
Cooking Instructions
Step 1: Preheat the oven
Preheat your oven to 375°F (190°C) so it’s ready when the pie is assembled.
Step 2: Prepare the apple filling
In a large mixing bowl, toss the sliced apples with sugar, brown sugar, cinnamon, nutmeg, lemon juice, and cornstarch until every slice is evenly coated. This mixture should look glossy and slightly sticky.
Step 3: Assemble the pie
Place one refrigerated pie crust into the bottom of the 9-inch pie dish, gently pressing it into the corners. Pour the apple mixture into the crust, spreading it evenly.
Step 4: Add the top crust
Cut the second pie crust into strips to create a lattice pattern over the apples. Weave the strips carefully and pinch the edges to seal. Sprinkle the top generously with black sugar for a dramatic Halloween look.
Step 5: Bake the pie
Bake for 45–50 minutes until the crust is golden brown and the filling bubbles around the edges. If the crust browns too quickly, cover it loosely with foil for the last 10 minutes.
Step 6: Cool and serve
Allow the pie to cool on a rack for at least 30 minutes so the filling can set. Serve warm or at room temperature.
Troubleshooting Tip: If your apples release too much juice during baking, mix an extra teaspoon of cornstarch into the filling next time to help thicken it.
Why You’ll Love This Recipe
Festive Flair: The black sugar adds an eerie, eye-catching finish perfect for Halloween parties.
Comforting Flavor: Warm spices and sweet-tart apples deliver that classic apple pie taste we love.
Beginner-Friendly: Using pre-made crust makes it approachable for home bakers.
Make-Ahead Ready: Bake the pie a day in advance and store it for stress-free entertaining.
Family Fun: A great baking project for kids who love helping decorate festive treats.
Mistakes to Avoid & Solutions
Soggy Bottom Crust: Always preheat your oven fully and avoid overfilling the pie. You can also place the pie dish on a preheated baking sheet to crisp the bottom crust.
Runny Filling: If apples are extra juicy, toss them with 1 extra tablespoon of cornstarch or drain excess liquid before baking.
Burned Edges: Check the pie after 30 minutes; cover the edges with foil if they start to brown too quickly.
Uneven Baking: Rotate the pie halfway through the baking time for even color and texture.
Crust Shrinking: Make sure the crust is properly chilled before baking to help it hold its shape.
Serving and Pairing Suggestions
Serve warm with a scoop of vanilla ice cream or a dollop of cinnamon whipped cream.
Pair with hot cider, black tea, or spiced chai for a cozy autumn drink.
Present the pie on a dark serving platter surrounded by tiny pumpkins for a dramatic Halloween table display.
Slice into smaller wedges for a dessert buffet at a Halloween gathering.
Storage and Reheating Tips
Store leftovers covered in foil or an airtight container at room temperature for up to 2 days or in the refrigerator for up to 5 days.
Reheat slices in a 300°F (150°C) oven for 10 minutes to revive the crispness of the crust.
Avoid microwaving for too long, as it may make the crust soggy.
FAQs
1. Can I use homemade pie crust instead of refrigerated?
Absolutely! A buttery homemade crust will work beautifully and add extra richness.
2. Which apple variety is best for this pie?
Tart apples like Granny Smith hold their shape well, but mixing them with sweeter varieties like Honeycrisp creates a balanced flavor.
3. How do I prevent the lattice from breaking while weaving?
Keep the dough chilled and handle it gently; cold dough is easier to work with.
4. Can I make this pie ahead of time?
Yes, bake it the day before and store it covered at room temperature or in the fridge if your kitchen is warm.
5. Can I freeze leftover pie?
You can freeze baked slices wrapped tightly in foil and stored in a freezer bag for up to 2 months. Thaw and reheat before serving.
Tips & Tricks
Chill the pie crust before baking to reduce shrinking.
Brush the top crust lightly with milk before sprinkling black sugar to help it stick better.
Use a mix of apple varieties for more depth of flavor.
Slice apples evenly so they cook at the same rate.
Place a baking sheet under the pie dish to catch any bubbling juices.
Recipe Variations
Caramel Poison Apple Pie: Drizzle caramel sauce over the apples before adding the top crust for a decadent twist.
Spiced Pear Variation: Replace half the apples with ripe pears for a slightly floral, spiced flavor.
Cranberry-Apple Pie: Add 1 cup fresh cranberries to the filling for a tart pop of color and taste.
Gluten-Free Version: Use a gluten-free pie crust and ensure the black sugar is certified gluten-free.
Mini Pies: Make individual pies using muffin tins for bite-sized Halloween party treats.
Final Thoughts
There’s something special about a dessert that sparks both conversation and a sense of wonder. As the pie cooled on my windowsill, I watched my grandkids press their noses to the glass, eager for the first slice. The black sugar shimmered in the late-afternoon light, giving the whole kitchen a bit of Halloween magic.
Sharing a pie that feels playful and a little mysterious makes the holiday feel more alive. This recipe is proof that baking can bring generations together around the table. Whether you’re serving it at a party or enjoying it quietly at home, this pie has a way of turning an ordinary night into a small celebration.
Halloween Poison Apple Pie
Ingredients
- 1 package refrigerated pie crusts
- 6 cups sliced apples Granny Smith or Honeycrisp work best
- ½ cup sugar
- ¼ cup brown sugar
- 1 tsp ground cinnamon
- ¼ tsp ground nutmeg
- 1 tbsp lemon juice
- 1 tbsp cornstarch
- Black sugar for sprinkling
Instructions
- Preheat the oven to 375°F (190°C).
- Toss the sliced apples with sugar, brown sugar, cinnamon, nutmeg, lemon juice, and cornstarch in a large bowl until glossy and evenly coated.
- Line a 9-inch pie dish with one crust, pressing it gently into the corners, then fill with the apple mixture.
- Cut the second crust into strips, weave into a lattice over the filling, seal the edges, and sprinkle generously with black sugar.
- Bake for 45–50 minutes until the crust is golden and the filling bubbles at the edges, covering loosely with foil if it browns too quickly.
- Cool on a rack for at least 30 minutes before serving warm or at room temperature.