One snowy December afternoon, I decided to try something playful with my grandchildren, a Pop Tart Gingerbread House. The idea was sparked while we sipped hot cocoa and admired the neighborhood holiday lights, thinking about how much fun it would be to build a miniature house entirely out of sweet treats.
We gathered around the kitchen table, Pop Tarts in hand, while colorful candy and icing waited patiently for their turn. My grandchildren’s eyes lit up at the thought of constructing a house they could decorate themselves. The process felt like a miniature architectural project, with lots of giggles, “careful now” reminders, and sticky fingers.
As we assembled the gingerbread house, I watched the simple Pop Tarts transform into a festive centerpiece. Each piece carefully ‘glued’ with icing, every candy strategically placed, it was chaos in the best possible way. This project wasn’t just about the house itself; it was about laughter, collaboration, and creating memories that would linger far beyond the holiday season.
Short Description
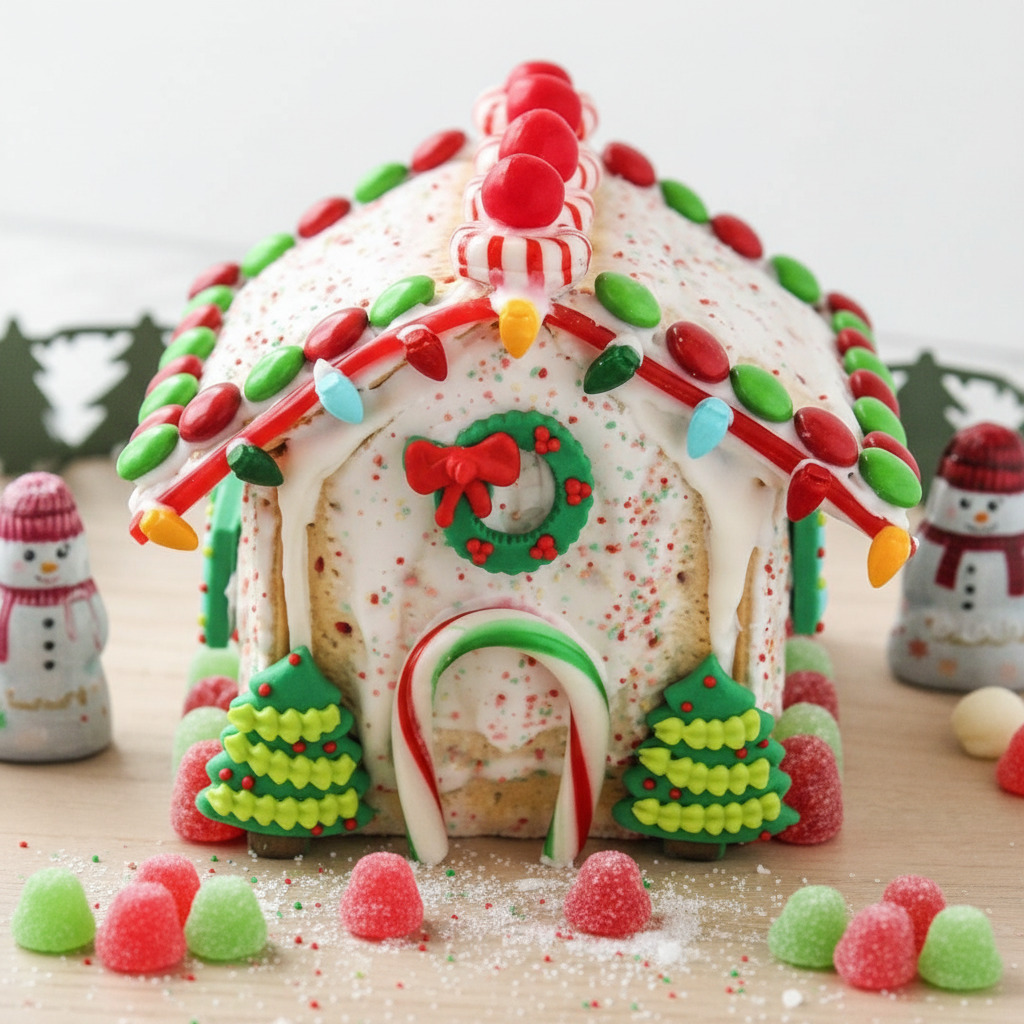
A fun and festive Pop Tarts Gingerbread House decorated with icing and colorful candies, perfect for a holiday activity with kids or a whimsical holiday centerpiece.
Key Ingredients
- 6 Strawberry Pop Tarts
- 1 tube decorating icing
- Assorted holiday candies for decoration
Tools Needed
- Parchment paper
- Knife
- Spatula or small offset spatula for icing
- Plate or baking sheet for assembly
Cooking Instructions
Step 1: Prepare Your Work Surface
Lay out a piece of parchment paper on a flat surface. This will make cleanup easier and help stabilize the house as you assemble it.
Step 2: Form the Base
Vertically place 1 Pop Tart down as the central wall. Lay another Pop Tart to the left and one to the right of it, aligning them evenly to form the base of the house.
Step 3: Trim the Roof Pieces
Using a knife, find the center of the top of the vertical Pop Tart and cut down so the angled top aligns with the side Pop Tarts. Lay the cut piece on top of the remaining Pop Tart and trim along the pointed top to match the roof’s shape.
Step 4: Assemble the House
Reposition the trimmed Pop Tart pieces to form the house structure, placing the pointed roof pieces on the ends. Use decorating icing to ‘glue’ the walls together. Allow them to set for a few minutes before attaching the roof pieces with icing.
Step 5: Decorate
Once all the edges are dry and stable, use decorating icing to ‘glue’ on Christmas candy as desired. Be creative—candy canes, sprinkles, and gumdrops make a whimsical, festive effect.
Why You’ll Love This Recipe
Quick and easy holiday activity
Uses simple, pantry-friendly ingredients
Fun for kids and adults alike
Creates a festive centerpiece that doubles as an edible treat
Encourages creativity and hands-on holiday fun
Mistakes to Avoid & Solutions
Unstable Walls
The Pop Tart walls may collapse if icing isn’t set.
Solution: Let each wall section dry for a few minutes before adding the roof.
Overdecorating Too Soon
Candy can fall off if icing hasn’t hardened.
Solution: Allow the house to set for 10–15 minutes before adding decorations.
Messy Cuts
Uneven roof edges can cause gaps in the structure.
Solution: Use a sharp knife and cut slowly, following the lines carefully.
Serving and Pairing Suggestions
Display as a holiday centerpiece before serving
Slice Pop Tarts or remove candy for individual treats
Pair with hot chocolate, coffee, or holiday punch for a festive snack
Great for family-style activities or cookie exchange tables
Storage and Reheating Tips
Store at room temperature for 2–3 days in an airtight container
Keep away from direct sunlight to prevent icing from melting
Not suitable for reheating, but can be enjoyed as-is as a cold treat
FAQs
1. Can I use other Pop Tart flavors?
Yes, any flavor works, but fruit-filled varieties hold the structure best.
2. Can I make multiple houses at once?
Absolutely—this recipe scales well for group activities or parties.
3. What candy works best for decoration?
Candy canes, gumdrops, mini chocolate chips, and sprinkles all work well.
4. How long should I wait for the icing to set?
Wait 10–15 minutes for the walls, and at least 20 minutes for the roof before heavy decorations.
5. Can I assemble this with younger children?
Yes, with supervision for trimming and careful handling of the icing.
Tips & Tricks
Use a small offset spatula for precise icing placement
Decorate in stages to prevent candy from sliding off
Try using colored icing tubes for a more festive appearance
Lay parchment paper under the house to catch excess icing
Recipe Variations
Chocolate Pop Tart House: Use chocolate Pop Tarts and chocolate icing for a rich twist.
Mini Pop Tart Village: Build several small houses on a tray for a festive display.
Candy Swap: Replace holiday candies with nuts or dried fruit for a less sweet version.
Final Thoughts
Creating this Pop Tart Gingerbread House is more than just building a treat, it’s about laughter, creativity, and holiday spirit. The combination of sweet Pop Tarts, colorful candy, and fluffy icing transforms a simple snack into an interactive centerpiece.
It’s a project that brings family together, sparks imagination, and delivers smiles at every stage of construction. Easy to assemble, visually delightful, and entirely edible, this whimsical gingerbread house adds a playful touch to any holiday celebration. Watching little hands decorate their own creations while giggling makes it a memory worth savoring.
Pop Tart Gingerbread House
Ingredients
- 6 Strawberry Pop Tarts
- 1 tube decorating icing
- Assorted holiday candies for decoration
Instructions
- Lay parchment paper on a flat surface to prepare your work area.
- Place one Pop Tart vertically as the central wall and align one Pop Tart on each side to form the base.
- Trim the roof pieces from another Pop Tart so the angled top fits the house structure.
- Assemble the house by attaching walls and roof pieces with decorating icing; let set.
- Decorate with Christmas candy, using icing to secure pieces as desired.