In this spring, my grandson’s school hosted a multicultural day, and every family was asked to bring a dish that represented their heritage or values. I remember standing in my kitchen that morning, flour on my apron and the smell of roasted garlic clinging to the air, thinking about what I could make that felt wholesome and warm. I didn’t want anything heavy or fussy—just something comforting, gluten-free, and simple enough for even the pickiest of little eaters.
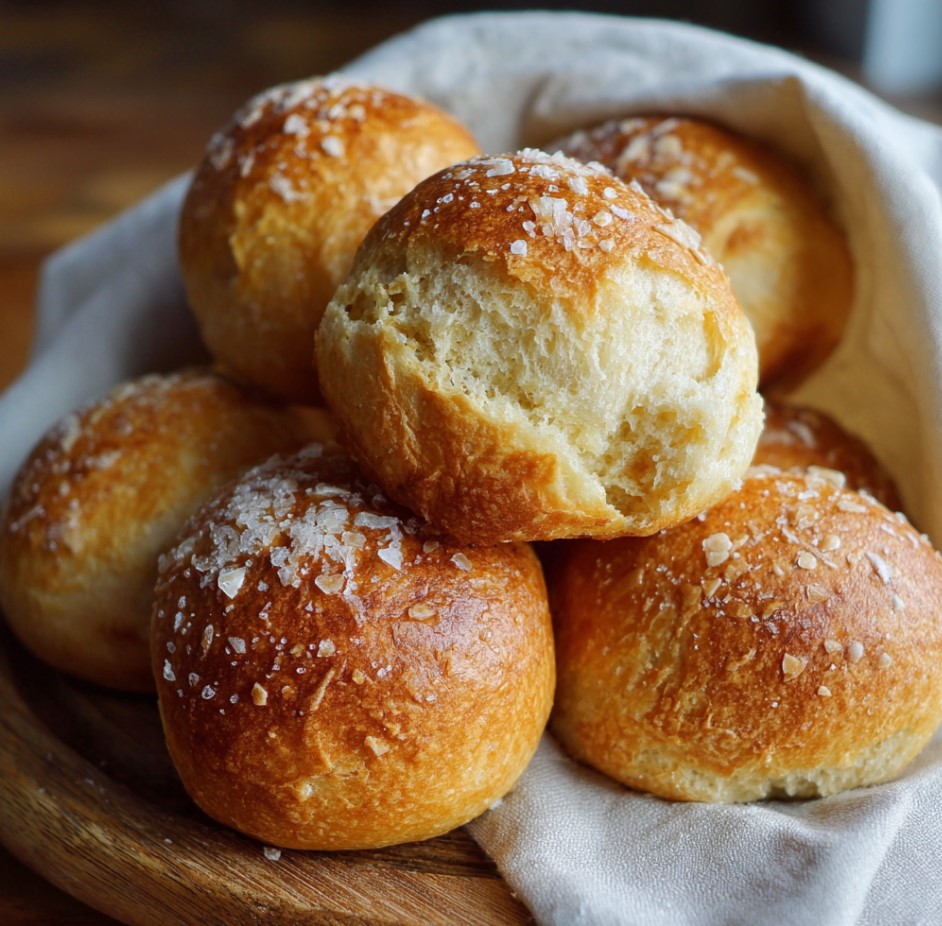
So I turned to these almond flour bread rolls. They’ve become a favorite in our home, especially after I began experimenting with different mix-ins like garlic powder and cheese. That day, I made a batch with cheddar and rosemary, and as I placed them into the basket lined with a kitchen towel, I hoped they’d hold their own beside all the more colorful dishes on the table.
At the event, I watched parents and kids reach for the rolls again and again—one mom even pulled me aside to ask what flour I used. “They’re grain-free?” she asked, amazed. That moment reminded me why I share recipes in the first place—not for praise, but for connection. Food has a quiet way of bringing people together, even across cafeteria tables.
Short Description
These almond flour bread rolls are soft, savory, and naturally gluten-free—perfect as a side or sandwich bun alternative. Quick to prepare and packed with protein, they’re a great option for anyone following a low-carb or grain-free lifestyle.
Key Ingredients
- 2 cups almond flour
- 1 teaspoon baking powder
- 1/2 teaspoon salt
- 3 large eggs
- 1/4 cup melted butter or olive oil
- 1 tablespoon apple cider vinegar
- 1/4 teaspoon garlic powder (optional)
- 1/4 cup shredded cheese (optional)
Tools Needed
- Large mixing bowl
- Medium mixing bowl
- Whisk
- Rubber spatula or wooden spoon
- Baking sheet
- Parchment paper
- Measuring cups and spoons
Cooking Instructions
Step 1: Preheat the Oven
Preheat your oven to 350°F (175°C). Line a baking sheet with parchment paper to prevent sticking and ensure even browning.
Step 2: Mix Dry Ingredients
In a large bowl, stir together almond flour, baking powder, salt, and garlic powder if using. Make sure everything is evenly distributed.
Step 3: Whisk Wet Ingredients
In a separate bowl, whisk the eggs, melted butter (or olive oil), and apple cider vinegar until the mixture is smooth and slightly frothy.
Step 4: Combine and Form Dough
Pour the wet mixture into the dry ingredients. Mix until a dough forms. If the mixture feels too sticky, let it rest for a minute to allow the flour to absorb the liquid. Fold in shredded cheese at this stage if using.
Step 5: Shape the Rolls
Divide the dough into 8 equal portions. Use your hands to gently shape them into round rolls and place them on the lined baking sheet, spacing them about 1 inch apart.
Step 6: Bake to Perfection
Bake for 20–25 minutes, or until the tops are golden brown and a toothpick inserted into the center comes out clean. The exterior should feel firm, while the inside remains soft and moist.
Step 7: Cool Slightly Before Serving
Let the rolls cool for 5–10 minutes. Serve warm, or store once fully cooled.
Why You’ll Love This Recipe
Soft Yet Satisfying: These rolls are tender on the inside with a slightly crisp outer edge.
Quick and Easy: They come together in under 30 minutes, no yeast or rising required.
Gluten-Free Goodness: Perfect for those with celiac or following a gluten-free lifestyle.
Low-Carb Friendly: A great option for keto or low-carb diets.
Versatile: You can flavor them with herbs, garlic, or cheese—or keep them plain for everyday use.
Mistakes to Avoid & Solutions
Using cold eggs or butter: This can cause the dough to seize up. Use room-temperature ingredients for a smoother mix.
Overmixing the dough: Stir just until combined. Overmixing can make the rolls dense.
Skipping parchment paper: These rolls can stick. Always line your baking sheet.
Not spacing rolls properly: Give them room to expand without sticking together.
Baking too long: Almond flour burns faster than wheat flour. Check at the 20-minute mark for doneness.
Serving and Pairing Suggestions
Breakfast: Serve warm with eggs and avocado or a dab of herb cream cheese.
Lunch: Slice and stuff with tuna salad, grilled veggies, or turkey and spinach.
Dinner: Perfect alongside soups like butternut squash or tomato basil.
Entertaining: Serve mini versions as sliders or appetizers with dips.
Style: Family-style in a basket, buffet-friendly, or on a rustic wooden board.
Storage and Reheating Tips
Storage: Store in an airtight container at room temperature for 2 days or in the fridge for up to 5 days.
Freezing: Freeze in a zip-top bag for up to 1 month. Wrap individually for convenience.
Reheating: Warm in a toaster oven at 300°F for 5–7 minutes or microwave for 10–15 seconds.
Tip: Place a damp paper towel over rolls when microwaving to maintain moisture.
FAQs
1. Can I make these rolls dairy-free?
Yes! Use olive oil instead of butter and skip the cheese or use a plant-based shredded cheese substitute.
2. Why is apple cider vinegar used?
It reacts with the baking powder to help the rolls rise slightly and gives a tender texture without tasting acidic.
3. Can I use coconut flour instead of almond flour?
No, coconut flour absorbs much more liquid and would require a different recipe altogether.
4. Do these rolls taste like regular bread?
Not exactly. They have a nutty, mildly sweet flavor and a denser texture, but are still satisfying and bread-like.
5. How do I make the rolls fluffier?
Use eggs at room temperature and be careful not to overmix. Adding a bit of shredded cheese can also improve the texture.
Tips & Tricks
For extra golden tops, brush with a little melted butter before baking.
Add chopped rosemary or thyme for a herby version.
Want a crusty finish? Bake an extra 2–3 minutes and cool on a wire rack.
Use a cookie scoop for evenly sized rolls.
Always preheat your oven for accurate baking times.
Recipe Variations
Cheddar Chive Rolls
Add 1/4 cup sharp cheddar and 1 tablespoon chopped chives to the dough. Proceed with recipe as usual. These pair beautifully with soups.
Garlic Herb Dinner Rolls
Mix in 1/2 teaspoon Italian seasoning and 1/4 teaspoon extra garlic powder. Brush tops with garlic-infused butter after baking.
Spicy Jalapeño Cheese Rolls
Fold in 1/4 cup shredded pepper jack cheese and 2 tablespoons finely diced jalapeños for a kick of heat. Serve with chili or grilled meats.
Mini Slider Buns
Divide dough into 12 smaller rolls and reduce baking time to 15–18 minutes. These are perfect for lunchbox sliders or party snacks.
Final Thoughts
I wrapped a few of these rolls in parchment and tucked them into my daughter’s bag after that school event. She called the next morning asking for the recipe, saying the kids had polished them off before bedtime. That made me smile.
These rolls may not look fancy, but they’ve found a spot at our table—and I imagine they might at yours too. From holiday dinners to quick weekday breakfasts, they adapt, impress, and quietly nourish. They remind me that simple, honest food made with care never goes out of style.
Almond Flour Bread Rolls
Print ThisIngredients
- 2 cups almond flour
- 1 teaspoon baking powder
- 1/2 teaspoon salt
- 3 large eggs
- 1/4 cup melted butter or olive oil
- 1 tablespoon apple cider vinegar
- 1/4 teaspoon garlic powder (optional)
- 1/4 cup shredded cheese (optional)
Instructions
Step 1: Preheat the Oven
Set oven to 350°F (175°C) and line a baking sheet with parchment paper.
Step 2: Mix Dry Ingredients
In a large bowl, combine almond flour, baking powder, salt, and garlic powder (if using).
Step 3: Whisk Wet Ingredients
In another bowl, whisk eggs, melted butter (or oil), and apple cider vinegar until smooth.
Step 4: Combine and Form Dough
Add wet mix to dry and stir until dough forms. Let rest if sticky. Fold in cheese if using.
Step 5: Shape the Rolls
Divide dough into 8 portions, shape into balls, and place on the baking sheet, 1 inch apart.
Step 6: Bake to Perfection
Bake for 20–25 minutes until golden and firm. A toothpick should come out clean.
Step 7: Cool Slightly Before Serving
Let cool for 5–10 minutes before serving or storing.