My son has a serious sweet tooth—especially when it comes to anything chocolate. He once told me, with all the seriousness a seven-year-old can muster, that “chocolate makes your heart smile.” That stuck with me. So when I wanted to bake something special to celebrate the end of his school week, I reached for a recipe that would make his little heart grin from ear to ear: Better Than Anything Bars.
The first time we baked these together, it turned into a whole adventure. I laid out the ingredients, and he insisted on being the “official toffee sprinkles expert.” As the bars baked, our kitchen filled with the smell of chocolate and caramel—a warm, buttery hug in the air.
Pulling the finished tray from the fridge that night, slicing into the cooled layers, and watching my son take the first bite. He closed his eyes dramatically like a mini food critic, gave a slow nod, and said, “Yup. Better than anything.”
And while these bars are rich and indulgent, I’ve found a few ways to make them a touch more balanced without losing any of their magic. If you’re someone who loves an easy, layered dessert with a perfect blend of gooey and crunchy, these bars will become your go-to too.
Short Description
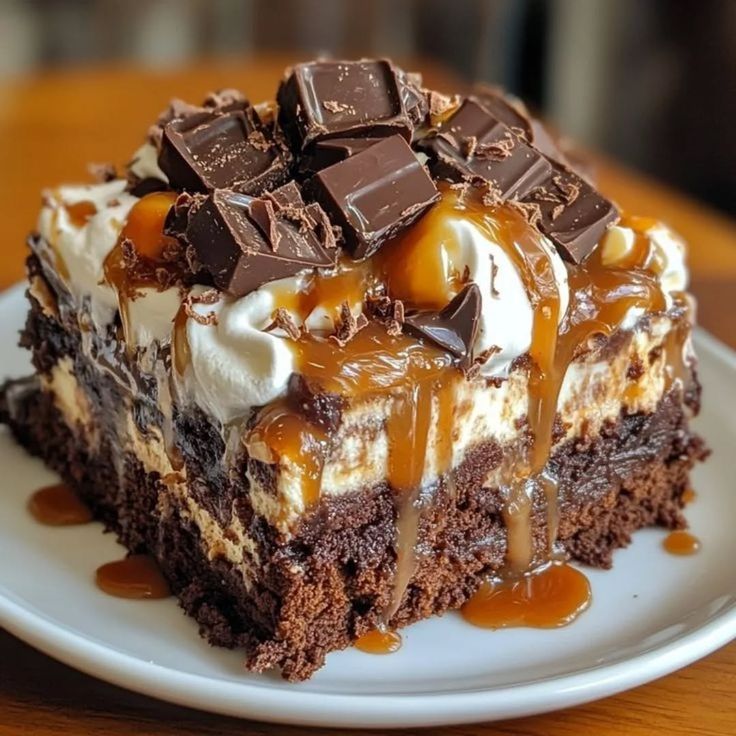
Decadent and ultra-easy, Better Than Anything Bars are layered dessert bars made with chocolate cake mix, caramel, toffee bits, and whipped topping. Rich, gooey, and downright irresistible—perfect for celebrations, potlucks, or a chocolate-lover’s treat!
Key Ingredients
- 1 box chocolate cake mix
- 1/2 cup unsalted butter, melted
- 1 can (14 oz) sweetened condensed milk
- 1 jar (12 oz) caramel sauce
- 1 cup crushed toffee bits (such as Heath)
- 1 1/2 cups whipped topping or whipped cream
- 1/2 cup mini chocolate chips (optional for garnish)
Tools Needed
- 9×13-inch baking dish
- Mixing bowl
- Spatula
- Measuring cups
- Oven
- Refrigerator
Cooking Instructions
Step 1: Prepare the Base
Preheat your oven to 350°F (175°C). Lightly grease a 9×13-inch baking dish to prevent sticking.
Step 2: Make the Dough
In a large mixing bowl, combine the chocolate cake mix with the melted butter. Stir until a thick, cohesive dough forms—similar to cookie dough. If it feels dry, add 1 tablespoon of water at a time.
Step 3: Bake the Crust
Press the dough evenly into the bottom of your greased baking dish. Bake for 12-15 minutes or until the crust is set and slightly puffed. It won’t look fully baked, and that’s okay.
Step 4: Layer the Sweetness
Remove the crust from the oven and while it’s still warm, pour the sweetened condensed milk and caramel sauce evenly over the surface. Use a spatula to spread them into a smooth layer.
Step 5: Add the Crunch
Sprinkle half of the crushed toffee bits on top of the caramel layer. This will create that irresistible crunch and toffee richness as it bakes.
Step 6: Bake Again
Return the baking dish to the oven and bake for an additional 10 minutes. The edges should look bubbly and caramelized.
Step 7: Cool Completely
Let the bars cool fully at room temperature. This is important—rushing this step can cause the whipped topping to melt later.
Step 8: Frost and Garnish
Once cooled, spread the whipped topping evenly over the surface. Garnish with the remaining crushed toffee bits and mini chocolate chips (if using) for an extra decadent touch.
Step 9: Chill Before Serving
Refrigerate for at least 2 hours to let the layers set. Then slice into 12 to 16 bars and enjoy!
Why You’ll Love This Recipe
Rich layers of chocolate, caramel, and toffee in every bite
Easy to assemble using a box mix—perfect for busy days
Great for parties, potlucks, or fridge-friendly make-ahead treats
Satisfies serious sweet cravings with minimal effort
Can be customized to fit dietary needs or personal preferences
Mistakes to Avoid & Solutions
Overbaking the crust: It should be just set, not crunchy. If overbaked, it may become too hard after chilling. Solution: Pull it at the 12-minute mark and press gently—if it springs back, it’s ready.
Pouring toppings on a cold crust: The caramel and condensed milk won’t soak in properly. Solution: Always pour over a warm crust for better absorption.
Spreading whipped topping too early: It’ll melt if the bars aren’t completely cool. Solution: Let the bars cool fully before adding any cold toppings.
Using hot caramel straight from the stovetop (if homemade): This can melt the base. Solution: Let the caramel cool slightly before pouring.
Cutting before chilling: The layers won’t hold. Solution: Chill for at least 2 hours—or even overnight.
Serving and Pairing Suggestions
Serve chilled for best texture and flavor
Great as a buffet-style dessert at birthdays or potlucks
Plate individually with a drizzle of extra caramel or chocolate sauce
Pair with black coffee or unsweetened tea to balance the richness
For a decadent dessert platter, serve alongside fresh strawberries or raspberries
Storage and Reheating Tips
Refrigerate: Store leftovers in an airtight container in the fridge for up to 5 days.
Freeze: Wrap individual bars tightly and freeze for up to 2 months. Thaw in the fridge overnight.
Reheating: Not recommended—best enjoyed cold or at room temperature to preserve layers.
FAQs
1. How do I crush toffee bits without a food processor?
Place the toffee bars in a zip-top bag and crush with a rolling pin or heavy skillet.
2. Can I make these bars gluten-free?
Yes! Use a gluten-free chocolate cake mix as the base. Double-check that the other ingredients are also gluten-free.
3. What kind of caramel sauce should I use?
Store-bought jarred caramel works great, but you can also use homemade. Just be sure it’s thick and pourable.
4. Can I use Cool Whip instead of whipped cream?
Absolutely. Both work well—Cool Whip is more stable if you’re making it ahead.
5. Why did my bars turn out too soft to slice?
They likely weren’t chilled long enough. Make sure to refrigerate for at least 2 hours or until fully set.
Tips & Tricks
Add a pinch of sea salt over the caramel layer for a sweet-salty combo
For cleaner slices, dip your knife in hot water and wipe it between cuts
If you’re short on time, chill the bars in the freezer for 45 minutes
Use parchment paper in your pan for easy removal and cleaner edges
Want a slightly lighter version? Use light whipped topping and reduced-fat condensed milk
Recipe Variations
1. Peanut Butter Twist
Swap out caramel sauce for warmed peanut butter and sprinkle chopped roasted peanuts instead of toffee bits. Adds a salty, nutty depth.
2. Mocha Lovers Version
Use mocha-flavored cake mix and add a teaspoon of espresso powder to the dough. Finish with a sprinkle of cocoa powder over the whipped topping.
3. Fruit-Nut Crunch
Top the whipped cream layer with chopped dried cranberries, toasted almonds, and a drizzle of honey for a more Mediterranean-inspired take.
4. Dairy-Free Alternative
Use dairy-free cake mix, coconut condensed milk, coconut-based whipped topping, and a dairy-free caramel sauce. Opt for dark chocolate chips without milk solids.
5. Banana Caramel Bars
Layer thin banana slices between the caramel and whipped topping for a banoffee-style twist.
Final Thoughts
A recipe that delivers joy through both its flavor and the memories made during the process can be truly special. Better Than Anything Bars have become more than a dessert in our home—they’re a little tradition wrapped in chocolate and caramel.
This dessert is a celebration of textures and tastes, with each bite offering gooey, creamy, and crunchy goodness. It’s also a forgiving recipe—perfect for beginners, adaptable for dietary needs, and endlessly customizable. Bake it for your kids, share it with coworkers, or save a few just for yourself—this recipe always delivers. And on a busy day, there’s something so rewarding about having a decadent tray of bars waiting in the fridge, just needing to be sliced and shared.
Better Than Anything Bars
Print ThisIngredients
- 1 box chocolate cake mix
- 1/2 cup unsalted butter, melted
- 1 can (14 oz) sweetened condensed milk
- 1 jar (12 oz) caramel sauce
- 1 cup crushed toffee bits (such as Heath)
- 1 1/2 cups whipped topping or whipped cream
- 1/2 cup mini chocolate chips (optional for garnish)
Instructions
Step 1: Prepare the Base
Preheat your oven to 350°F (175°C). Lightly grease a 9×13-inch baking dish to prevent sticking.
Step 2: Make the Dough
In a large mixing bowl, combine the chocolate cake mix with the melted butter. Stir until a thick, cohesive dough forms—similar to cookie dough. If it feels dry, add 1 tablespoon of water at a time.
Step 3: Bake the Crust
Press the dough evenly into the bottom of your greased baking dish. Bake for 12-15 minutes or until the crust is set and slightly puffed. It won’t look fully baked, and that’s okay.
Step 4: Layer the Sweetness
Remove the crust from the oven and while it’s still warm, pour the sweetened condensed milk and caramel sauce evenly over the surface. Use a spatula to spread them into a smooth layer.
Step 5: Add the Crunch
Sprinkle half of the crushed toffee bits on top of the caramel layer. This will create that irresistible crunch and toffee richness as it bakes.
Step 6: Bake Again
Return the baking dish to the oven and bake for an additional 10 minutes. The edges should look bubbly and caramelized.
Step 7: Cool Completely
Let the bars cool fully at room temperature. This is important—rushing this step can cause the whipped topping to melt later.
Step 8: Frost and Garnish
Once cooled, spread the whipped topping evenly over the surface. Garnish with the remaining crushed toffee bits and mini chocolate chips (if using) for an extra decadent touch.
Step 9: Chill Before Serving
Refrigerate for at least 2 hours to let the layers set. Then slice into 12 to 16 bars and enjoy!