One of my dearest neighbors, Luisa, hosts an ornament exchange every December a warm gathering filled with cinnamon candles, twinkling garlands, and neighbors balancing cups of cider in one hand while trying to outdo each other’s cookies with the other. This year, a quiet teen from down the block showed up holding a tin of store-bought fudge.
I gently nudged a tray of Red Velvet Snowballs her way, and her smile bloomed into a full conversation about baking. Across the room, a retired math teacher was trading spiced biscotti recipes, and her husband tried sneaking a second helping of the snowballs.
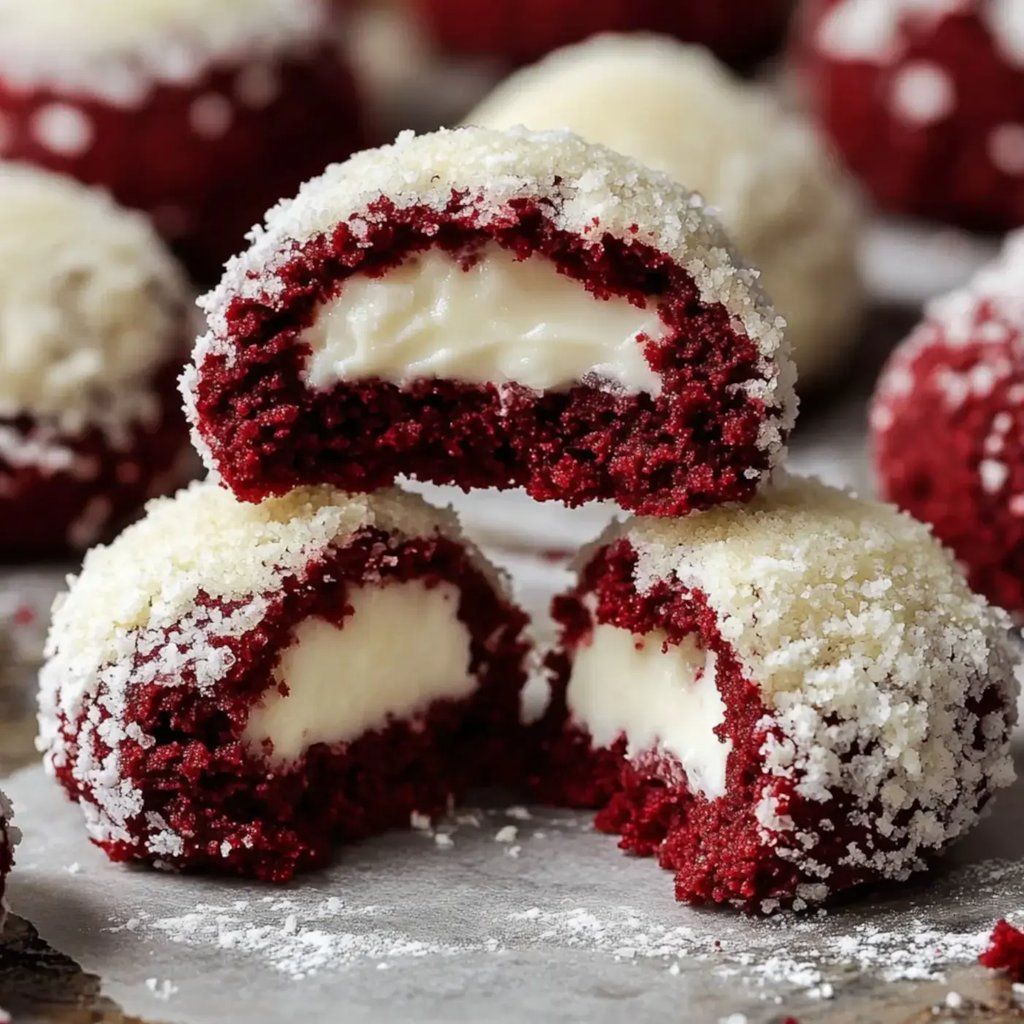
These cheerful bites soft inside, dusted with powdered sugar like fresh snow became the unspoken star of the table. Another friend confessed they reminded her of her grandma’s Christmas cocoa cake, and someone else whispered they’d eaten three and weren’t even sorry. It’s a simple recipe, made with pantry staples, but it sparks joy in the most unexpected corners. Red Velvet Snowballs have a way of softening conversations and anchoring small moments that feel meaningful without trying too hard.
There’s something delightful about a cookie that’s as tender as cake, yet bite-sized enough for second helpings. And on days when snow flurries dance past the kitchen window, nothing smells more inviting than cocoa, cream cheese, and vanilla coming together in the oven.
Short Description
These Red Velvet Snowballs are soft, rich cocoa-infused cookies with a subtle tang from cream cheese, rolled in powdered sugar for a snowy, festive finish—perfect for holiday trays or cozy treats.
Key Ingredients
- 2 cups all-purpose flour
- ½ cup unsweetened cocoa powder
- ½ cup unsalted butter, softened
- ¾ cup granulated sugar
- ½ cup powdered sugar (for coating)
- 1 large egg
- 4 oz cream cheese, softened
- 1 tsp vanilla extract
- 1 tsp baking powder
- ¼ tsp salt
Tools Needed
- Hand or stand mixer
- Mixing bowls
- Rubber spatula
- Baking sheets
- Parchment paper
- Cookie scoop or tablespoon
- Wire cooling rack
Cooking Instructions
Step 1: Preheat and Prep
Preheat oven to 350°F (175°C). Line two baking sheets with parchment paper.
Step 2: Cream Butter and Sugar
In a large bowl, beat softened butter with granulated sugar until pale and fluffy—about 2 to 3 minutes.
Step 3: Add Cream Cheese and Wet Ingredients
Mix in softened cream cheese until smooth. Add the egg and vanilla extract, beating until fully incorporated.
Step 4: Combine Dry Ingredients
In a separate bowl, whisk flour, cocoa powder, baking powder, and salt. Gradually add to the wet mixture, mixing on low until just combined. Avoid overmixing.
Step 5: Chill the Dough
Scoop tablespoon-sized rounds onto prepared sheets, spacing them about 2 inches apart. Chill trays in the fridge for at least 30 minutes to help the dough hold its shape while baking.
Step 6: Bake and Cool
Bake for 10–12 minutes, until the edges are set but centers are still soft. Let cool on the sheet for 5 minutes before transferring to a rack.
Step 7: Coat in Sugar
Once cookies are just warm, roll gently in powdered sugar for a festive snowy look.
Why You’ll Love This Recipe
Rich cocoa flavor with soft, cake-like texture
Cream cheese adds depth and tenderness
Simple ingredients and easy steps
Great for gifting, parties, or cozy afternoons
Beautiful presentation with a snowy sugar finish
Mistakes to Avoid & Solutions
Skipping the Chill Time
Warm dough spreads too much while baking.
Solution: Always chill the shaped dough for 30 minutes—it keeps the cookies thick and tender.
Overmixing the Dough
This can make cookies tough instead of soft.
Solution: Mix just until the dry ingredients are absorbed—no more.
Using Cold Cream Cheese
It won’t blend smoothly and leaves lumps.
Solution: Let it sit at room temperature until soft and pliable before mixing.
Rolling in Sugar Too Early
The sugar may melt and disappear into the warm cookie.
Solution: Wait a few minutes after baking, then roll in sugar while still slightly warm.
Overbaking
Cookies turn dry and crumbly.
Solution: Remove when edges are set but centers look slightly soft—they’ll firm as they cool.
Serving and Pairing Suggestions
Arrange on a holiday cookie platter with green mint cookies and white chocolate bark
Serve warm with hot cocoa or espresso
Pair with a scoop of vanilla ice cream for a fun dessert twist
Wrap in tins or gift bags for edible presents
Plate as part of a dessert buffet at festive gatherings
Storage and Reheating Tips
Store in an airtight container at room temperature for up to 5 days
For longer storage, freeze in a sealed bag up to 1 month
Reheat gently in the microwave (10–15 seconds) to restore softness
Dust with fresh powdered sugar before serving if storing overnight
FAQs
1. Can I make the dough ahead of time?
Yes. You can refrigerate the dough (covered) for up to 24 hours. Let it sit for 10 minutes before scooping.
2. Can I freeze the baked cookies?
Absolutely. Freeze in a single layer first, then transfer to a container. Thaw at room temperature.
3. Can I use a gluten-free flour blend?
Yes, as long as it’s a 1:1 baking blend with xanthan gum, the texture stays quite similar.
4. Can I add red food coloring for a brighter look?
You can add ½ teaspoon of gel red food coloring if you’d like the snowballs to match classic red velvet tones.
5. Can I double the recipe for a big batch?
Yes, just make sure to chill dough on separate trays, and bake in batches for even results.
Tips & Tricks
Use a cookie scoop for even, bakery-style sizing
If dough is sticky, lightly flour your hands before shaping
Sift powdered sugar before rolling to avoid clumps
Add a dash of espresso powder to deepen the cocoa flavor
Try a second roll in powdered sugar after cooling for a thicker coating
Recipe Variations
Chocolate Chip Red Velvet Snowballs
Add ½ cup mini dark chocolate chips into the dough just before chilling. Bake as directed. These offer a melty surprise inside.
Red Velvet Peppermint Snowballs
Stir in ¼ teaspoon peppermint extract and 2 tablespoons of crushed peppermint candies. Roll in sugar as usual. A fresh, holiday twist.
Red Velvet Cream Cheese-Stuffed Snowballs
Scoop a small amount of dough, flatten, and place a ½ tsp of cream cheese mixed with sugar inside. Seal and bake. Extra creamy inside.
Vegan Red Velvet Snowballs
Use vegan butter and plant-based cream cheese. Substitute egg with a flax egg (1 tbsp flaxseed + 3 tbsp water). Texture remains soft and moist.
Spiced Red Velvet Snowballs
Add ½ tsp cinnamon and ¼ tsp nutmeg to the dry mix for a warm, spiced variation perfect for winter evenings.
Final Thoughts
There’s a quiet joy in baking something that invites others to linger just a little longer. These Red Velvet Snowballs do exactly that light in your hand, rich on the tongue, and impossible to stop at one. From a teenage neighbor finding her place at a holiday party to friends trading their favorite cookie secrets, these little bites carry big warmth.
Sharing them has brought unexpected moments side conversations in candlelit kitchens, compliments from shy guests, laughter over empty trays. Recipes like this aren’t just for dessert they’re for those pauses in the season when sweetness takes center stage in more ways than one.

Festive Red Velvet Snowballs
Ingredients
- 2 cups all-purpose flour
- ½ cup unsweetened cocoa powder
- ½ cup unsalted butter softened
- ¾ cup granulated sugar
- ½ cup powdered sugar for coating
- 1 large egg
- 4 oz cream cheese softened
- 1 tsp vanilla extract
- 1 tsp baking powder
- ¼ tsp salt
Instructions
- Preheat oven to 350°F (175°C) and line two baking sheets with parchment.
- Cream softened butter with granulated sugar until fluffy.
- Mix in cream cheese, then add egg and vanilla until smooth.
- Whisk flour, cocoa powder, baking powder, and salt, then add to wet mixture just until combined.
- Scoop tablespoon-sized dough rounds onto sheets, spaced 2 inches apart, and chill 30 minutes.
- Bake 10–12 minutes until edges set and centers soft. Cool 5 minutes, then transfer to a rack.
- Roll the slightly warm cookies in powdered sugar for a snowy finish.