Three days before the school holiday bake sale, my neighbor Maria stopped by with a basket full of vintage cookie cutters one shaped like a Christmas tree instantly caught my eye. Her youngest had outgrown baking with her, and she figured they deserved a second life.
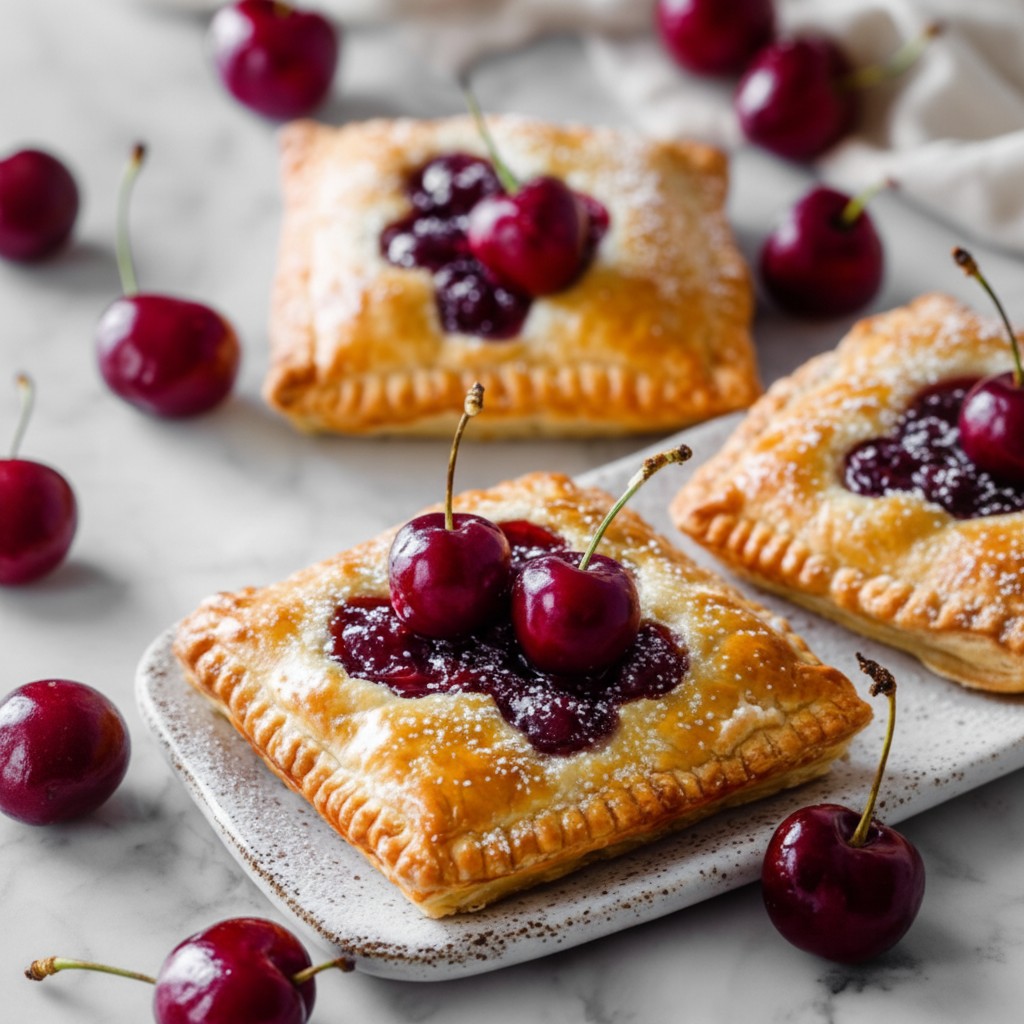
That same evening, the twins across the street were decorating their porch with string lights while blasting holiday jazz, and the whole block smelled like cinnamon and cold pine. That’s how the idea for these Cherry Hand Pies began simple, shaped, and sweet, with just the right balance of nostalgia and cheer.
Later that week, we hosted a neighborhood cookie swap, and one of the kids bit into a flaky tree and gasped, “Is this filled with jelly?” The cherry filling had bubbled slightly over the edge, creating little red sugar trails down the crust. Parents snuck extras into napkins, and even Mr. Thompson, who’s sworn off desserts, asked if I had more.
These cherry hand pies aren’t just festive they’re a little celebration in every bite. You get the tart burst of cherries, buttery golden crust, and just enough sparkle from the coarse sugar. They’re easy to prep, travel well, and are perfect for any winter gathering or afternoon tea when you want something homemade without starting from scratch.
Short Description
These Cherry Hand Pies are made with buttery pie crust, sweet-tart cherry filling, and baked to golden perfection perfect for holidays, bake sales, or cozy treats year-round.
Key Ingredients
- 3 boxes refrigerated pie crust (2 crusts per box)
- 1 can (21 oz) cherry pie filling
- 2 large eggs
- 2 tablespoons water
- Coarse sanding sugar (optional)
Tools Needed
- Rolling pin
- 3–4 inch holiday tree cookie cutter
- Parchment-lined baking sheet
- Pastry brush
- Fork
- Sharp knife
- Cooling rack
Cooking Instructions
Step 1: Prepare the Oven and Crust
Preheat your oven to 350°F (175°C). Thaw the pie crusts as directed. Line a large baking sheet with parchment and whisk eggs with water in a small bowl to make an egg wash.
Step 2: Roll and Cut
Roll out one crust at a time until it’s ¼ to ⅛ inch thick. Use the cookie cutter to cut about 7 tree shapes per crust. Save excess dough. Repeat for all crusts, then re-roll the scraps to cut more trees.
Step 3: Fill and Seal
Place half the tree cutouts on the baking sheet. Spoon 1 to 1½ tablespoons of cherry pie filling in the center of each. Brush the edges with egg wash.
Step 4: Add the Tops
Gently place a second tree cutout over each filled base. Start pressing edges from the trunk upward. Use a fork to crimp and seal the edges, avoiding the filling. Cut small slits in the top for venting.
Step 5: Finish and Bake
Brush tops with egg wash and sprinkle with coarse sugar, if using. Bake for 20–25 minutes until golden brown. Cool on a wire rack. Serve warm or at room temperature.
Why You’ll Love This Recipe
Fun and festive presentation for holidays
Easy to assemble with store-bought crust
Kid-friendly and adult-approved
Portable, hand-held treats perfect for sharing
Flaky texture with a bright cherry burst
Mistakes to Avoid & Solutions
Overfilling the pies
Too much filling can cause leakage and prevent sealing.
Solution: Stick to 1–1½ tablespoons of filling per pie and keep it centered.
Cracking the dough when rolling
Cold crusts can tear or crack easily.
Solution: Let crusts soften slightly at room temperature before rolling.
Edges not sealing properly
Leaky edges result in lost filling and messy pies.
Solution: Use egg wash on edges and seal with a fork—press firmly but gently.
No vent holes
Without slits, steam gets trapped inside.
Solution: Make a few small cuts with a sharp knife on top of each pie.
Baking too long
Overbaking can dry out the filling and burn the edges.
Solution: Check at the 20-minute mark; look for golden edges and bubbling tops.
Serving and Pairing Suggestions
Serve warm with a scoop of vanilla bean ice cream
Pair with mulled wine or spiced cider for festive gatherings
Stack them on a tiered dessert stand for parties
Wrap individually in wax paper as edible gifts
Serve on a brunch buffet alongside quiche or cinnamon rolls
Storage and Reheating Tips
Store cooled hand pies in an airtight container for up to 3 days at room temperature
Refrigerate for longer freshness—up to 5 days
Reheat in the oven at 300°F for 8–10 minutes to maintain crispiness
Avoid microwaving; it makes the crust soggy
FAQs
1. Can I use homemade cherry pie filling instead of canned?
Yes! Just be sure it’s not too runny or it’ll leak during baking.
2. Can I make these hand pies ahead of time?
Absolutely. You can assemble them, freeze on a tray, and then bake straight from frozen—just add 5 more minutes to baking time.
3. What if I don’t have a tree-shaped cutter?
You can use any 3–4 inch cutter: hearts, stars, circles—even biscuit cutters work well.
4. How do I prevent the crust from getting soggy?
Avoid overfilling, seal the edges tightly, and vent the tops properly.
5. Can I freeze the baked pies?
Yes. Wrap them tightly and freeze for up to 2 months. Reheat in the oven directly from frozen.
Tips & Tricks
Chill the assembled pies for 10 minutes before baking to keep their shape
Mix a little almond extract into the cherry filling for a flavor boost
If crust cracks while sealing, patch with a thin dough scrap and brush with egg wash
Use sparkling white sugar for a snowy holiday effect
Let pies rest 5 minutes before serving filling will set and won’t burn your tongue
Recipe Variations
Apple-Cinnamon Hand Pies
Swap cherry filling for diced apples tossed with brown sugar, cinnamon, and lemon juice. Bake as directed.
Nutella-Banana Hand Pies
Spread 1 teaspoon of Nutella and 2 thin banana slices in each pie. Reduce bake time to 18–20 minutes.
Savory Spinach Feta Pies
Use sautéed spinach, crumbled feta, and a touch of garlic. Brush with egg wash and sprinkle sesame seeds on top.
Mini Berry Medley Pies
Combine blueberries, raspberries, and a splash of lemon juice with sugar. Great for summer parties.
Peach Cardamom Pies
Use diced peaches and a pinch of ground cardamom. Deliciously fragrant and slightly exotic.
Final Thoughts
These cherry hand pies brought a bit of joyful mess into my kitchen and a whole lot of laughter to the table. Watching kids pick their favorite tree shapes, adults sneaking “just one more,”and everyone asking for the recipe showed just how meaningful simple food becomes during the holidays.