Last Christmas, my youngest granddaughter came bouncing into the kitchen, her cheeks still pink from the cold, and asked if we could make “something red, sweet, and full of Oreos.” That combination made me chuckle. Red and sweet? Sounded festive enough. And Oreos? That girl could live on them. So we pulled out my recipe notebook—filled with scribbles, smudges, and decades of family favorites—and began experimenting.
I remembered a red velvet cake my mother used to make every Valentine’s Day. It had the slightest cocoa note and that nostalgic, velvety texture. I married it in my mind with the classic cheesecake I’ve perfected over the years, and her favorite treat—Oreos—found their way into both the crust and filling.
That chilly December afternoon turned into one of those magical baking moments, where the scent of cocoa and cream cheese filled the air, and laughter echoed louder than the hand mixer. We decorated the top like a snowy holiday wonderland, complete with mini Oreos that looked like tiny wreaths.
Since then, Red Velvet Oreo Cheesecake has become a showstopper at every family gathering. It’s indulgent, beautiful, and surprisingly easy once you break it down. Let me take you through this recipe—straight from my cozy kitchen to yours.
Short Description
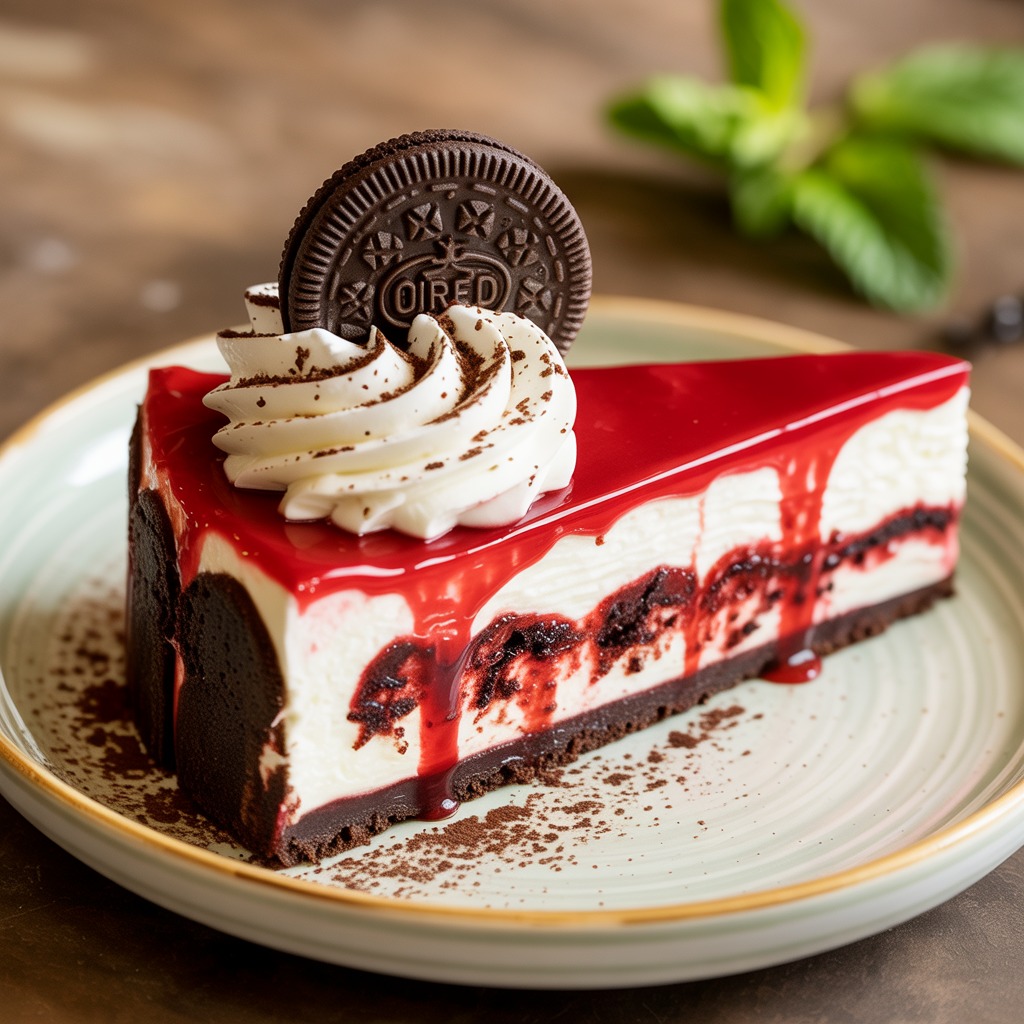
This Red Velvet Oreo Cheesecake combines the creamy richness of classic cheesecake with the chocolatey notes of red velvet and a crunchy Oreo crust, topped with silky ganache, whipped cream, and festive garnishes. It’s the perfect blend of elegance and comfort.
Key Ingredients
For the crust:
- ¼ cup melted butter
- 2 cups Oreo crumbs
For the filling:
- 1 cup sugar
- 24 oz (680g) softened cream cheese
- 1 tsp vanilla extract
- 1 cup sour cream
- 3 large eggs
- 1 tsp red food coloring
- 2 tbsp cocoa powder
- ½ cup broken Oreos
For the topping:
- ½ cup heavy cream
- 1 cup semi-sweet chocolate chips
- Red velvet cake crumbs (for garnish)
- Mini Oreos (for decoration)
- Whipped cream
- Sprinkles (optional)
Tools Needed
- 9-inch springform pan
- Electric mixer or stand mixer
- Rubber spatula
- Mixing bowls
- Measuring cups and spoons
- Oven thermometer (optional but recommended)
- Microwave-safe bowl
Cooking Instructions
Step 1: Preheat and Prep
Preheat your oven to 325°F (163°C). Lightly grease a 9-inch springform pan. If you’re using a water bath, wrap the outside of the pan with foil to prevent leaks.
Step 2: Make the Oreo Crust
Mix Oreo crumbs with melted butter until well combined. Press the mixture firmly into the bottom of your prepared pan to form an even layer. Bake for 10 minutes. Remove and set aside to cool while preparing the filling.
Step 3: Prepare the Cream Cheese Base
In a large bowl, beat the softened cream cheese until smooth and fluffy. Add in sugar, sour cream, and vanilla extract. Mix on medium speed until completely blended and creamy.
Step 4: Add Eggs and Color
Add the eggs one at a time, beating on low after each addition until just combined. Avoid overmixing. Stir in the cocoa powder and red food coloring. Then gently fold in the broken Oreo pieces with a spatula.
Step 5: Assemble and Bake
Pour the red velvet filling over the cooled crust. Smooth the top with a spatula. Bake for 60–70 minutes until the edges are set and the center has a slight jiggle. Turn off the oven, crack the door open, and let the cheesecake sit inside for 1 hour.
Step 6: Chill to Set
Transfer the cheesecake to the refrigerator and chill for at least 4 hours, preferably overnight. This helps it set properly and enhances the flavors.
Step 7: Prepare the Ganache Topping
Microwave the chocolate chips and heavy cream together in 30-second intervals, stirring each time, until smooth and glossy. Let it cool slightly, then pour over the chilled cheesecake, allowing it to gently spread.
Step 8: Decorate Before Serving
Top with whipped cream, mini Oreos, a sprinkle of red velvet cake crumbs, and festive sprinkles if desired. Slice with a warm knife for clean edges.
Why You’ll Love This Recipe
– Eye-catching red hue perfect for holidays and celebrations
– Oreo lovers’ dream: double the cookies in both crust and filling
– Crowd-pleaser for all ages
– Can be made a day ahead—ideal for parties or gatherings
– Balanced sweetness, not overpowering
– Decadent yet easy to pull together
– Customizable with your favorite toppings
Mistakes to Avoid & Solutions
Mistake 1: Overmixing the batter
Solution: Mix on low speed, especially after adding the eggs. Overmixing adds too much air, causing cracks.
Mistake 2: Not using room-temperature ingredients
Solution: Let cream cheese, eggs, and sour cream sit out for 30–60 minutes. Cold ingredients don’t blend smoothly.
Mistake 3: Skipping the chill time
Solution: Chill for at least 4 hours. Overnight is even better. Rushing this step affects the texture and firmness.
Mistake 4: Water bath leaking into the pan
Solution: Wrap the springform pan tightly in two layers of heavy-duty foil or use a silicone water bath barrier.
Mistake 5: Ganache too thick or too runny
Solution: Let it cool slightly before pouring. If too thick, microwave for 10 seconds and stir again.
Serving and Pairing Suggestions
– Serve chilled with hot coffee or espresso for a bold contrast.
– Pair with a fresh berry compote to brighten the richness.
– Great as a centerpiece for holidays or birthdays.
– Slice into small squares for dessert buffets.
– Garnish with crushed peppermint for a festive winter twist.
Storage and Reheating Tips
Store in the fridge (covered with plastic wrap or in an airtight container) for up to 5 days.
Freeze slices individually by wrapping them in plastic wrap and foil. Store in a freezer-safe container for up to 1 month.
To thaw: Place in the fridge overnight.
Do not microwave to reheat. Let it come to room temperature naturally for best texture.
FAQs
1. Can I use reduced-fat cream cheese?
Yes, but expect a slightly softer texture. Avoid fat-free—it won’t set properly.
2. Can I make this cheesecake without food coloring?
Certainly! It’ll still taste delicious. You’ll just miss that classic red hue.
3. What’s the best way to crush Oreos?
Use a food processor for fine crumbs. A zip-top bag and rolling pin work great for coarser bits.
4. My cheesecake cracked—what went wrong?
It might be overbaked or cooled too quickly. Cracks are common but easily hidden with toppings!
5. Can I make it in advance?
Yes! Cheesecake is actually better the next day. Make it up to 2 days ahead for best results.
Tips & Tricks
Place a shallow pan of hot water in the oven on a lower rack to help prevent cracks.
Run a warm knife around the edges before removing the springform to prevent tearing.
Let the ganache cool slightly before adding to avoid melting the cheesecake.
Use full-fat ingredients for the creamiest texture.
Chill mixing bowls and beaters before whipping cream for better volume.
Recipe Variations
1. Mint Chocolate Oreo Cheesecake
Use mint Oreos in the crust and filling
Replace red food coloring with green
Add ½ tsp peppermint extract to the batter
2. Strawberry Swirl Red Velvet Cheesecake
Drop small spoonfuls of strawberry jam into the batter before baking
Swirl gently with a toothpick for a marbled look
Garnish with fresh strawberries and white chocolate drizzle
3. Gluten-Free Red Velvet Cheesecake
Use gluten-free chocolate sandwich cookies for the crust
Ensure all other ingredients (especially chocolate chips) are certified gluten-free
Follow the same steps and bake time
Final Thoughts
Every time I make this Red Velvet Oreo Cheesecake, it brings back the memory of that joyful winter afternoon with Lily—the way her eyes lit up at each layer we added, and the proud smile when we sliced into the final masterpiece. It’s a recipe that holds more than just flavor; it holds a moment. It’s my way of stitching together the old and the new—my mother’s red velvet cake, my classic cheesecake, and a child’s love for Oreos—all wrapped into one rich, velvety bite.
I hope this dessert finds a place at your table too, becoming part of your own stories, laughter, and celebrations. Go ahead, put on some music, tie on your apron, and make something worth remembering.
Red Velvet Oreo Cheesecake
Print ThisIngredients
- For the crust:
- ¼ cup melted butter
- 2 cups Oreo crumbs
- For the filling:
- 1 cup sugar
- 24 oz (680g) softened cream cheese
- 1 tsp vanilla extract
- 1 cup sour cream
- 3 large eggs
- 1 tsp red food coloring
- 2 tbsp cocoa powder
- ½ cup broken Oreos
- For the topping:
- ½ cup heavy cream
- 1 cup semi-sweet chocolate chips
- Red velvet cake crumbs (for garnish)
- Mini Oreos (for decoration)
- Whipped cream
- Sprinkles (optional)
Instructions
Step 1: Preheat and Prep
Preheat oven to 325°F (163°C). Grease a 9-inch springform pan. If using a water bath, wrap the pan in foil to prevent leaks.
Step 2: Make the Oreo Crust
Combine Oreo crumbs and melted butter. Press into the pan bottom and bake for 10 minutes. Let cool.
Step 3: Prepare the Cream Cheese Base
Beat cream cheese until smooth. Add sugar, sour cream, and vanilla; mix until creamy.
Step 4: Add Eggs and Color
Mix in eggs one at a time on low speed. Stir in cocoa and red food coloring, then fold in broken Oreos.
Step 5: Assemble and Bake
Pour filling over crust and smooth the top. Bake for 60–70 minutes until edges are set and center jiggles slightly. Turn off oven, crack door, and let it sit for 1 hour.
Step 6: Chill to Set
Refrigerate at least 4 hours or overnight to set and develop flavor.
Step 7: Prepare the Ganache Topping
Microwave chocolate chips and heavy cream in 30-second bursts, stirring until smooth. Cool slightly and pour over cheesecake.
Step 8: Decorate Before Serving
Top with whipped cream, mini Oreos, cake crumbs, and sprinkles if using. Slice with a warm knife for clean cuts.