My kitchen has always been my little sanctuary, but it was a quiet Sunday after church that turned a simple craving into a treasured discovery. My husband had nodded off in the recliner, the cat was purring at my feet, and I found myself flipping through a worn-out spiral notebook filled with my mother’s handwritten recipes—many of them marked with spills and scribbles from years past.
Tucked in the back pocket was a single index card I’d never noticed before. It read, “6-Min Caramels – Fast, Don’t Blink!” in her cursive, underlined twice. Curious, I wiped flour from my fingers and decided to give it a go.
I always thought good caramel needed a candy thermometer, copper pot, and a whole lot of patience. But this recipe? It broke every rule I knew—and still delivered those golden, chewy squares that cling just right to your teeth. The scent alone, rich and buttery, swirled through the house and had my husband wandering in, rubbing his eyes and asking, “What smells like grandma’s kitchen in here?”
That first bite? It was like pressing rewind—back to holidays, bake sales, and warm wax paper wrapping. This recipe became an instant favorite, especially during busy seasons when time is short but a little homemade sweetness is needed. I’ve since made it more times than I can count, shared it with friends, tucked it in gift boxes, and always, always included a little story with each batch. Let me share that tradition with you.
Short Description
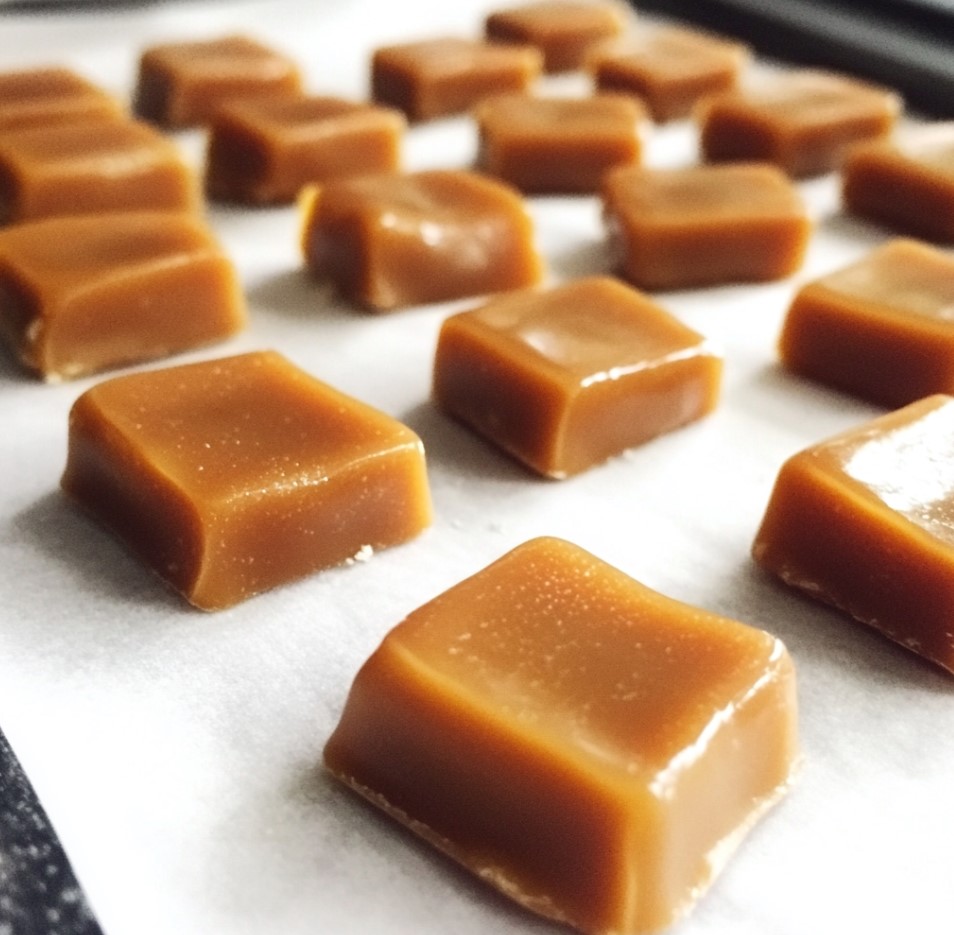
Six-Minute Caramels are soft, buttery, chewy treats made in the microwave with just a few pantry staples. They’re incredibly quick and perfect for gifting, snacking, or indulging your sweet tooth without turning on the stove.
Key Ingredients
- 1/2 cup salted butter (1 stick), melted
- 1/2 cup light corn syrup
- 1/2 cup granulated sugar
- 1/2 cup light brown sugar
- 1/2 cup sweetened condensed milk
- 1 teaspoon vanilla extract
- 1/4 teaspoon table salt (optional – omit if using sea salt on top)
Tools Needed
- 2-quart microwave-safe bowl (deep enough to prevent bubbling over)
- Silicone spatula or wooden spoon
- 8×8-inch square baking dish
- Parchment paper or butter for greasing
- Sharp knife or kitchen scissors
- Candy thermometer (optional but helpful)
- Wax paper (for wrapping)
Cooking Instructions
Step 1: Prepare the Dish
Lightly grease an 8×8-inch square baking dish or line it with parchment paper for easy removal once the caramels are set.
Step 2: Combine the Ingredients
In a large, microwave-safe bowl (at least 2-quart capacity), mix together the melted butter, light corn syrup, granulated sugar, brown sugar, and sweetened condensed milk. Stir until everything is smooth and blended.
Step 3: Microwave in Intervals
Microwave the mixture on high for 6 minutes total, but stop every 2 minutes to stir. Stirring helps distribute the heat evenly and prevents scorching. At each interval, the caramel will bubble and begin to thicken. Be cautious—it gets very hot.
Step 4: Test for Doneness
After 6 minutes, the caramel should reach the soft-ball stage (about 240°F or 115°C). If you’re unsure or want firmer caramels, microwave for an extra 30 seconds to 1 minute. Use a candy thermometer if needed.
Step 5: Add Vanilla and Salt
Once microwaving is complete, carefully stir in the vanilla extract and table salt (if using). Mix well, but gently—it’s still bubbling hot.
Step 6: Pour and Cool
Immediately pour the hot caramel mixture into your prepared dish. Let it cool at room temperature for 1 to 2 hours, or until firm to the touch.
Step 7: Cut and Wrap
Once fully set, cut the caramel into squares or rectangles using a sharp knife. If desired, wrap individual pieces in wax paper for easy storage or gifting.
Why You’ll Love This Recipe
- Quick—ready in under 10 minutes
- No candy thermometer required (but helpful!)
- Only 7 simple ingredients
- Perfect for last-minute gifts
- Soft, chewy, buttery texture
- Microwave-friendly—no stovetop mess
- Nostalgic flavor with modern ease
Mistakes to Avoid & Solutions
Mistake 1: Bowl Overflowing in Microwave
Solution: Use a bowl that holds at least 2 quarts. The mixture bubbles up significantly.
Mistake 2: Caramel Too Soft or Too Hard
Solution: Use a thermometer if needed. For softer caramels, stop at exactly 6 minutes. For firmer, add 30-60 seconds, but monitor closely.
Mistake 3: Uneven Texture or Burnt Spots
Solution: Stir thoroughly at the 2-minute and 4-minute marks. Uneven heating causes clumps or burning.
Mistake 4: Sticky Mess During Cutting
Solution: Lightly oil your knife or use parchment paper to guide clean slices. Chill slightly if too soft to cut.
Mistake 5: Forgetting the Vanilla
Solution: Add it immediately after cooking, not before—it burns easily during microwaving.
Serving and Pairing Suggestions
These caramels shine on their own, but they’re also wonderful in:
– Holiday treat platters
– Homemade dessert jars
– Sprinkled with flaky sea salt for contrast
– Dipped halfway in melted dark chocolate
– Chopped and folded into brownies or cookies
Pair them with:
– Black coffee or espresso for a bittersweet balance
– A small glass of port or bourbon after dinner
– Warm apple cider or chai in fall gatherings
Storage and Reheating Tips
Room Temperature: Store in an airtight container for up to 2 weeks.
Refrigerator: Keeps well for 1 month. Let soften slightly before eating.
Freezer: Freeze wrapped caramels in a zip-top bag for up to 3 months. Thaw at room temperature.
Reheating: Not necessary, but if you’d like to soften a firmer caramel, microwave it for 5–10 seconds.
FAQs
1. Can I double this recipe?
Yes, but use a larger microwave-safe bowl and add 1–2 minutes to the cook time, stirring every 2 minutes.
2. What if I don’t have corn syrup?
You can substitute with golden syrup or honey, but the texture may be slightly grainier and less elastic.
3. Why did my caramels turn out grainy?
Graininess usually comes from undissolved sugar. Make sure to stir thoroughly and avoid overheating.
4. Can I use unsalted butter?
Yes—just add 1/4 teaspoon of salt to the mixture to maintain that balanced flavor.
5. How do I keep the caramels from sticking to the knife?
Oil your knife lightly or chill the caramels briefly before cutting. A hot knife also slices cleanly.
Tips & Tricks
Line the dish with parchment paper leaving overhang—it lifts out like a charm.
Sea salt on top adds a lovely contrast. Sprinkle while still warm.
Stir in crushed nuts or espresso powder just before pouring into the pan.
If giving as gifts, wrap in wax paper and add a handwritten tag—it’s charming and personal.
For extra shine, use a silicone spatula to smooth the top right after pouring.
Recipe Variations
1. Salted Espresso Caramels
Add 1 teaspoon instant espresso powder with the vanilla.
Sprinkle with flaky sea salt before cooling.
Adds a coffeehouse twist with deep richness.
2. Chocolate Swirl Caramels
Melt 1/4 cup dark chocolate chips. Swirl into the top of the caramel after pouring it into the dish using a skewer.
Let set as usual. You’ll get gorgeous marbled bites.
3. Nutty Honey Caramels
Replace corn syrup with honey.
Stir in 1/2 cup chopped toasted pecans or walnuts after microwaving.
Adds earthy sweetness and crunch.
4. Coconut Caramels
Use coconut condensed milk (dairy-free version).
Stir in 1/4 teaspoon coconut extract with the vanilla.
Finish with toasted coconut flakes on top.
Final Thoughts
These little squares are like sticky-sweet time capsules, wrapping up flavor, ease, and family warmth in every bite. It delights me that something so quick can carry so much meaning. Whether it’s a rushed afternoon, a gift for a neighbor, or a craving that won’t quit, this recipe fits right in without asking much from you.
I think my mother knew what she was doing when she scribbled that note on the index card. “Fast, don’t blink”—she wasn’t just talking about the cook time. She was passing on a piece of love in under ten minutes. And now, I hope it finds its way to your kitchen and creates a new story there, too.
Six-Minute Caramels
Print ThisIngredients
- 1/2 cup salted butter (1 stick), melted
- 1/2 cup light corn syrup
- 1/2 cup granulated sugar
- 1/2 cup light brown sugar
- 1/2 cup sweetened condensed milk
- 1 teaspoon vanilla extract
- 1/4 teaspoon table salt (optional – omit if using sea salt on top)
Instructions
Step 1: Prepare the Dish
Grease an 8×8-inch baking dish or line with parchment paper for easy removal.
Step 2: Combine the Ingredients
In a large (2-quart) microwave-safe bowl, stir together melted butter, corn syrup, both sugars, and sweetened condensed milk until smooth.
Step 3: Microwave in Intervals
Microwave on high for 6 minutes, stopping to stir at the 2- and 4-minute marks. Mixture will bubble and thicken—handle carefully.
Step 4: Test for Doneness
After 6 minutes, check for soft-ball stage (240°F/115°C). For firmer caramels, microwave 30–60 seconds more if needed.
Step 5: Add Vanilla and Salt
Stir in vanilla and salt (if using) carefully—mixture will still be very hot.
Step 6: Pour and Cool
Pour into prepared dish. Let cool at room temperature for 1–2 hours, until firm.
Step 7: Cut and Wrap
Cut into squares or rectangles. Wrap in wax paper if storing or gifting.