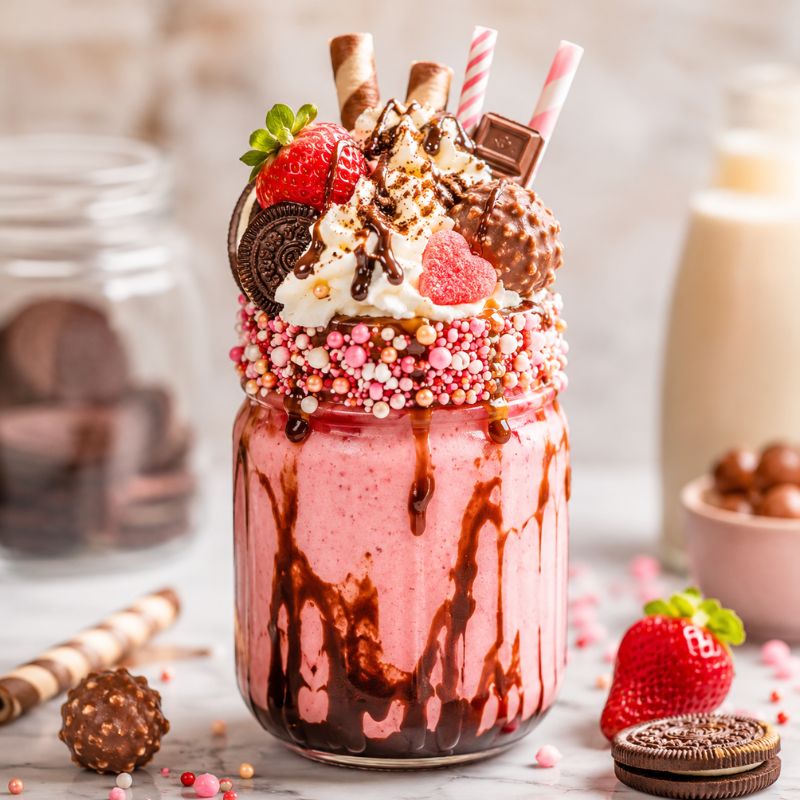
A good milkshake feels like instant happiness in a glass. It is cold, creamy, sweet, and thick enough to feel like dessert, yet easy enough to make in just a few minutes. The best part is how simple it can be: ice cream, milk, vanilla, and a blender can create something smooth, frosty, and deeply satisfying.
Milkshakes can also be surprisingly easy to customize. A classic vanilla shake can become chocolate, strawberry, peanut butter, cookies and cream, coffee, banana, or caramel with only a few small changes. The real secret is balance. Too much milk makes the shake thin. Too much ice cream can make it too thick to sip. The right ratio gives that creamy diner style texture that moves slowly through a straw but still feels silky.
This recipe keeps the method simple and reliable. The ice cream is slightly softened so it blends smoothly, the milk is added gradually, and the shake is served right away while it is cold and fluffy.
It is perfect for casual desserts, summer treats, birthday parties, weekend snacks, or a fun drink after dinner. With a few thoughtful toppings, even a basic milkshake can feel like a little celebration.
Short Description
This creamy milkshake recipe blends vanilla ice cream, cold milk, and vanilla extract into a thick, smooth, refreshing dessert drink. It is easy to customize with chocolate, fruit, cookies, peanut butter, caramel, or whipped cream.
Key Ingredients
- Vanilla ice cream: 3 cups, slightly softened
- Whole milk: ¾ cup, cold
- Vanilla extract: 1 tsp
- Salt: 1 tiny pinch, optional
- Whipped cream: ½ cup, optional for topping
- Chocolate syrup: 2 tbsp, optional for topping
- Sprinkles: 1 tbsp, optional for garnish
- Maraschino cherries: 2 cherries, optional for garnish
Tools Needed
- Blender
- Measuring cups
- Measuring spoons
- Ice cream scoop
- Tall glasses
- Long spoon
- Straws
- Rubber spatula
Cooking Instructions
Step 1: Chill the Glasses
Place 2 tall glasses in the freezer for 5 to 10 minutes before blending. Cold glasses help the milkshake stay thick and frosty longer. This step is optional, but it makes the finished drink feel more like a classic ice cream shop shake.
Step 2: Soften the Ice Cream Slightly
Let 3 cups vanilla ice cream sit at room temperature for 3 to 5 minutes. It should be scoopable but not melted. Slightly softened ice cream blends more smoothly and creates a creamier texture. If the ice cream melts too much, the shake can turn thin.
Step 3: Add the Ice Cream to the Blender
Scoop the softened ice cream into the blender first. Starting with ice cream helps the blades catch the mixture and creates a thick base. Use a rubber spatula if needed to move the scoops closer to the blades.
Step 4: Add Milk and Flavor
Pour in ¾ cup cold whole milk, 1 tsp vanilla extract, and 1 tiny pinch of salt if using. The salt does not make the shake taste salty. It simply helps the vanilla and cream taste a little fuller.
Step 5: Blend Until Smooth
Blend on low speed for 10 seconds, then increase to medium speed for another 10 to 20 seconds. Stop as soon as the shake looks smooth, thick, and creamy. Overblending can warm the mixture and make it thinner. The texture should look glossy and slowly pourable.
Step 6: Adjust the Thickness
Check the texture before serving. If the milkshake is too thick, add 1 tbsp cold milk at a time and blend for 3 to 5 seconds. If it is too thin, add ¼ cup ice cream and blend briefly. The best texture should coat a spoon and move slowly through a straw.
Step 7: Pour Into Glasses
Remove the chilled glasses from the freezer and pour the milkshake evenly into them. Use a spatula to scrape out the blender so none of the creamy shake is wasted. The shake should look smooth, pale, and frosty.
Step 8: Add Toppings
Top each milkshake with whipped cream if desired. Drizzle with chocolate syrup, add sprinkles, and finish with a cherry. Serve immediately while the shake is cold, thick, and fluffy.
Why You’ll Love This Recipe
It takes only a few minutes to make.
The texture is thick, creamy, and smooth.
The ingredients are simple and easy to find.
It can be served as a dessert, snack, or party drink.
The recipe is easy to customize with many flavors.
It works well for kids, casual guests, and family nights.
The milk can be adjusted for a thicker or thinner shake.
It tastes like a classic diner treat without leaving home.
Mistakes to Avoid & Solutions
Adding Too Much Milk at Once
Too much milk can turn a thick milkshake into a thin sweet drink. Start with ¾ cup milk for 3 cups ice cream. Add more only 1 tbsp at a time after blending. This gives better control over the final texture.
Using Ice Cream That Is Too Melted
Melted ice cream makes the milkshake loose and less frosty. Let the ice cream soften only until it is easy to scoop. If it becomes soupy, place it back in the freezer for 10 to 15 minutes before blending.
Overblending the Shake
Blending for too long can warm the mixture and make it thin. Blend only until smooth. A milkshake usually needs less than 30 seconds in a strong blender. Stop, check the texture, and blend again only if needed.
Using Warm Milk
Cold milk keeps the shake thick and refreshing. Warm or room temperature milk can melt the ice cream quickly. Use milk straight from the refrigerator for the best texture.
Skipping the Texture Check
Different ice cream brands vary in thickness and air content. Some need more milk, while others need less. Check the shake after the first blend. Adjust with small amounts of milk or ice cream until it looks thick and creamy.
Adding Mix Ins Too Early
Cookies, candy pieces, fruit, and chocolate chips can become too blended if added at the start. Blend the base first, then add mix ins and pulse briefly. This keeps little pieces in the shake and gives better texture.
Serving Too Late
Milkshakes are best right after blending. If they sit too long, they melt and lose their frosty body. Prepare glasses and toppings before blending so the shake can be served immediately.
Serving and Pairing Suggestions
Milkshakes are perfect as a dessert drink, but they can also make simple treats feel more fun. Serve them with burgers, fries, grilled cheese, sliders, pizza, cookies, brownies, cupcakes, or fresh fruit. The creamy sweetness pairs especially well with salty snacks and warm baked desserts.
For a classic diner style serving, pour the milkshake into tall chilled glasses and top with whipped cream, chocolate syrup, and a cherry. For a birthday party, serve smaller portions in clear cups with colorful sprinkles and paper straws. For a dessert bar, set out toppings like crushed cookies, mini chocolate chips, caramel sauce, chopped nuts, and sliced strawberries.
For a lighter serving style, divide the shake into smaller glasses and pair it with fruit skewers or oatmeal cookies. For a more indulgent dessert, serve it with brownies or a warm chocolate chip cookie on the side. A milkshake can also be poured into a chilled bowl and topped like a soft ice cream dessert.
Storage and Reheating Tips
Milkshakes taste best immediately after blending. Their creamy, frosty texture begins to soften quickly as the ice cream melts. For the best result, prepare the glasses and toppings first, then blend and serve right away.
If there are leftovers, pour the milkshake into an airtight freezer safe container and freeze for up to 1 month. The texture will become firmer, more like soft ice cream. To serve again, let it sit at room temperature for 10 to 15 minutes, then stir or reblend with 1 to 2 tbsp cold milk.
Milkshakes should not be reheated. They are meant to stay cold. If a leftover shake becomes icy after freezing, blend it briefly with a splash of milk to bring back a smoother texture. Avoid storing a milkshake in the refrigerator for long because it will melt into sweet milk instead of staying thick.
FAQs
1. How do you make a milkshake thicker?
Add more ice cream and use less milk. Start with 3 cups ice cream and ¾ cup milk, then adjust slowly. Chilling the glasses and avoiding overblending also help keep the shake thick.
2. Can a milkshake be made without a blender?
Yes. Place softened ice cream and milk in a large jar or bowl. Mash and stir with a spoon or whisk until smooth. The texture may be less airy, but it will still taste creamy and sweet.
3. What milk is best for milkshakes?
Whole milk gives the creamiest texture, but 2 percent milk also works. For a lighter shake, use low fat milk. For a dairy free version, use oat milk, almond milk, or coconut milk with dairy free ice cream.
4. Why is my milkshake too thin?
A thin milkshake usually has too much milk, melted ice cream, or too much blending. Add ¼ cup ice cream and blend briefly. Next time, start with less milk and add more only if needed.
5. Can frozen fruit be added to a milkshake?
Yes, frozen fruit works well and can make the shake thicker. Add ½ cup frozen strawberries, bananas, cherries, or mango to the blender with the ice cream and milk. Blend until smooth, then adjust the texture if needed.
6. Can milkshakes be made ahead of time?
Milkshakes are best fresh, but they can be frozen and reblended later. Store in a freezer safe container, thaw briefly, then blend with a splash of milk. The texture will not be exactly the same as fresh, but it can still taste delicious.
7. How much milkshake does this recipe make?
This recipe makes about 2 large milkshakes or 4 smaller dessert servings. The final amount depends on the ice cream brand, how much air is blended in, and any added toppings or mix ins.
Tips & Tricks
- Use cold milk for the best frosty texture.
- Let ice cream soften slightly before blending.
- Add milk gradually instead of all at once.
- Blend only until smooth.
- Chill glasses before serving.
- Add cookies or candy at the end and pulse briefly.
- Use a tiny pinch of salt to deepen the flavor.
- Serve immediately for the thickest texture.
- Keep extra ice cream nearby for quick thickness adjustments.
Recipe Variations
Chocolate Milkshake
Replace vanilla ice cream with 3 cups chocolate ice cream. Add 2 tbsp chocolate syrup and use ½ cup milk at first, then add more if needed. Blend until smooth. The flavor becomes rich, cocoa forward, and classic.
Strawberry Milkshake
Use 3 cups vanilla ice cream, ½ cup cold milk, and 1 cup sliced fresh or frozen strawberries. Add 1 tbsp sugar only if the berries are tart. Blend until smooth and pink. The flavor is fruity, creamy, and refreshing.
Cookies and Cream Milkshake
Use 3 cups vanilla ice cream and ¾ cup milk. Blend until smooth, then add 6 chocolate sandwich cookies and pulse 3 to 5 times. The shake should have cookie pieces throughout. The flavor is sweet, creamy, and slightly chocolatey.
Peanut Butter Milkshake
Add ¼ cup creamy peanut butter to the basic milkshake recipe. Blend until fully smooth. For a chocolate peanut butter version, add 1 tbsp chocolate syrup. The flavor becomes nutty, rich, and extra satisfying.
Banana Milkshake
Add 1 ripe banana to the basic recipe and reduce the milk to ½ cup at first. Blend until smooth. Add more milk if needed. The banana gives natural sweetness and a thick, creamy body.
Coffee Milkshake
Add 1 tsp instant espresso powder or ¼ cup chilled strong coffee to the basic recipe. If using brewed coffee, reduce the milk to ½ cup. Blend until smooth. The flavor becomes cool, creamy, and gently bold.
Salted Caramel Milkshake
Add 2 tbsp caramel sauce and a tiny pinch of salt to the basic recipe. Blend until smooth, then drizzle extra caramel inside the glass before pouring. The flavor is buttery, sweet, and lightly salty.
Conclusion
A milkshake is simple, but the right texture makes it feel unforgettable. Thick ice cream, cold milk, and quick blending create a drink that is creamy, frosty, and full of comfort. This recipe keeps the process easy while still giving room for flavor and fun. The base can stay classic with vanilla or turn into chocolate, fruit, cookies, coffee, peanut butter, or caramel in just a few minutes.
It is also one of the most flexible desserts to serve. A tall glass with whipped cream feels playful, while smaller portions can make a party table look cheerful and easy. The key is balance: enough milk to blend smoothly, enough ice cream to stay thick, and just enough topping to make each glass feel special. Milkshakes are best enjoyed fresh, cold, and slightly fluffy right after blending. Once the basic method is learned, it becomes easy to create a shake for almost any craving. A creamy milkshake has a way of turning an ordinary moment into something sweet, relaxed, and memorable.
Classic Milkshake
Materials
- 3 cups Vanilla ice cream slightly softened
- ¾ cups Whole milk cold
- 1 tsp Vanilla extract
- 1 tiny pinch Salt optional
- ½ cup Whipped cream optional for topping
- 2 tbsp Chocolate syrup optional for topping
- 1 tbsp Sprinkles optional for garnish
- 2 Maraschino cherries optional for garnish
Instructions
- Place 2 tall glasses in the freezer for 5 to 10 minutes before blending. Cold glasses help the milkshake stay thick and frosty longer. This step is optional, but it makes the finished drink feel more like a classic ice cream shop shake.
- Let 3 cups vanilla ice cream sit at room temperature for 3 to 5 minutes. It should be scoopable but not melted. Slightly softened ice cream blends more smoothly and creates a creamier texture. If the ice cream melts too much, the shake can turn thin.
- Scoop the softened ice cream into the blender first. Starting with ice cream helps the blades catch the mixture and creates a thick base. Use a rubber spatula if needed to move the scoops closer to the blades.
- Pour in ¾ cup cold whole milk, 1 tsp vanilla extract, and 1 tiny pinch of salt if using. The salt does not make the shake taste salty. It simply helps the vanilla and cream taste a little fuller.
- Blend on low speed for 10 seconds, then increase to medium speed for another 10 to 20 seconds. Stop as soon as the shake looks smooth, thick, and creamy. Overblending can warm the mixture and make it thinner. The texture should look glossy and slowly pourable.
- Check the texture before serving. If the milkshake is too thick, add 1 tbsp cold milk at a time and blend for 3 to 5 seconds. If it is too thin, add ¼ cup ice cream and blend briefly. The best texture should coat a spoon and move slowly through a straw.
- Remove the chilled glasses from the freezer and pour the milkshake evenly into them. Use a spatula to scrape out the blender so none of the creamy shake is wasted. The shake should look smooth, pale, and frosty.
- Top each milkshake with whipped cream if desired. Drizzle with chocolate syrup, add sprinkles, and finish with a cherry. Serve immediately while the shake is cold, thick, and fluffy.