
Baking your own artisan bread at home is a deeply rewarding culinary pursuit, and the foundation of that journey lies in creating a vibrant sourdough starter. Unlike commercial baking methods that rely on isolated, manufactured yeast strains, a traditional sour dough bread from starter system utilizes wild, ambient yeasts and beneficial lactic acid bacteria captured directly from your environment and the grain itself.
Many people view the process of managing a starter dough with a sense of intimidation, believing it requires lab-like precision or complex chemistry. In reality, learning how to start sourdough starter cultures simply requires patience, consistent warmth, and a basic understanding of microbial fermentation.
This comprehensive guide outlines the exact science behind cultivating a homemade sourdough starter, provides a foolproof daily creation schedule, and covers troubleshooting steps to ensure your baking success.
The Biological Science of Wild Fermentation
A sourdough bread starter is a living, symbiotic culture of wild yeasts (primarily Kazachstania exigua) and lactic acid bacteria (specifically Lactobacillus sanfranciscensis). When flour and water are combined and left exposed to ambient air, enzymes instantly begin breaking down complex starches into simple sugars.
The wild yeasts consume these sugars, producing carbon dioxide gas and ethanol as byproducts, which creates the physical rise and airy pocket structure within starter dough for sourdough bread. Concurrently, the lactic acid bacteria ferment the remaining carbohydrates, producing lactic and acetic acids.
These acids lower the pH of the mixture, rendering it highly acidic (typically around a pH of 4.0 to 4.5). This acidity serves two vital culinary purposes: it gives homemade sourdough bread its signature tangy flavor profile, and it acts as a natural antimicrobial barrier that prevents harmful pathogens or spoilage organisms from invading the culture.
Required Equipment and Ingredients
To successfully create a sourdough starter without introducing unwanted bacteria, clean tools and quality ingredients are mandatory.
Essential Equipment
-
A Clean Glass Jar: A 1-quart wide-mouth Mason jar or a glass Weck jar is perfect. Avoid using airtight plastic containers, as gas pressure needs to escape.
-
A Digital Kitchen Scale: Fermentation requires precise mass measurements. Measuring flour by volume (cups) is highly inaccurate due to packing densities.
-
A Stirring Utensil: A small silicone spatula or a wooden spoon.
-
A Rubber Band: Placed around the outside of the jar to track the physical rise of the sourdough dough starter.
Choosing Your Flour and Water
The Flour: For a fast, resilient culture, use unbleached organic rye flour or whole wheat flour for the initial setup. Whole grains contain higher concentrations of wild yeasts on their outer hulls. For daily maintenance, standard unbleached all-purpose flour or bread flour works beautifully. If you require dietary adaptations, a gluten-free sourdough bread starter can be cultivated using brown rice flour or buckwheat flour following the exact same mechanical steps.
The Water: Use filtered, unchlorinated water at warm room temperature (75°F to 80°F). Tap water containing heavy chlorine or chloramine can stun or kill the delicate wild microbes you are trying to attract.
Daily Schedule: Sourdough Starter from Scratch
This step-by-step timeline outlines how to start a sourdough bread starter or make sourdough starter from scratch over a standard 7-day maturation window.
Day 1: The Initial Blend
Place your glass jar on the digital scale and tare it to zero. Add 50 grams of whole wheat or rye flour and 50 grams of warm filtered water. Stir vigorously with your spatula until no dry flour pockets remain, scraping down the inside walls of the jar. This aggressive stirring incorporates vital oxygen into the paste. Cover the jar loosely with a lid or a cloth secured by a rubber band. Place it in a warm location (70°F to 80°F) for 24 hours.
Day 2: The First Discard and Feed
Open the jar. You may see a few tiny bubbles, or nothing at all. This is normal. Discard all but 50 grams of your starter base into the trash. To the remaining 50 grams in the jar, add 50 grams of unbleached all-purpose flour and 50 grams of warm water (a standard 1:1:1 ratio by weight). Stir thoroughly, cover loosely, and rest for 24 hours.
Day 3: Initial Microbial Surge
You may notice a surge of activity, an airy volume rise, or a slightly sour, fruity aroma. This is often caused by temporary bacteria (Leuconostoc) before the true wild yeasts fully take over. Repeat the exact feeding ritual: discard down to 50 grams of starter, add 50 grams of all-purpose flour, and 50 grams of water. Snap a rubber band around the jar right at the height of the top of the paste to track movement over the next day.
Days 4 to 6: Steady Fermentation
Repeat the discard and feeding routine at the exact same time every day. The aroma will shift from a sharp, cheesy smell to a pleasant, clean scent reminiscent of fresh yogurt, green apples, or beer. The basic sourdough starter will begin rising and falling in a predictable wave pattern every 12 to 24 hours.
Day 7: A Mature, Active Yeast Culture
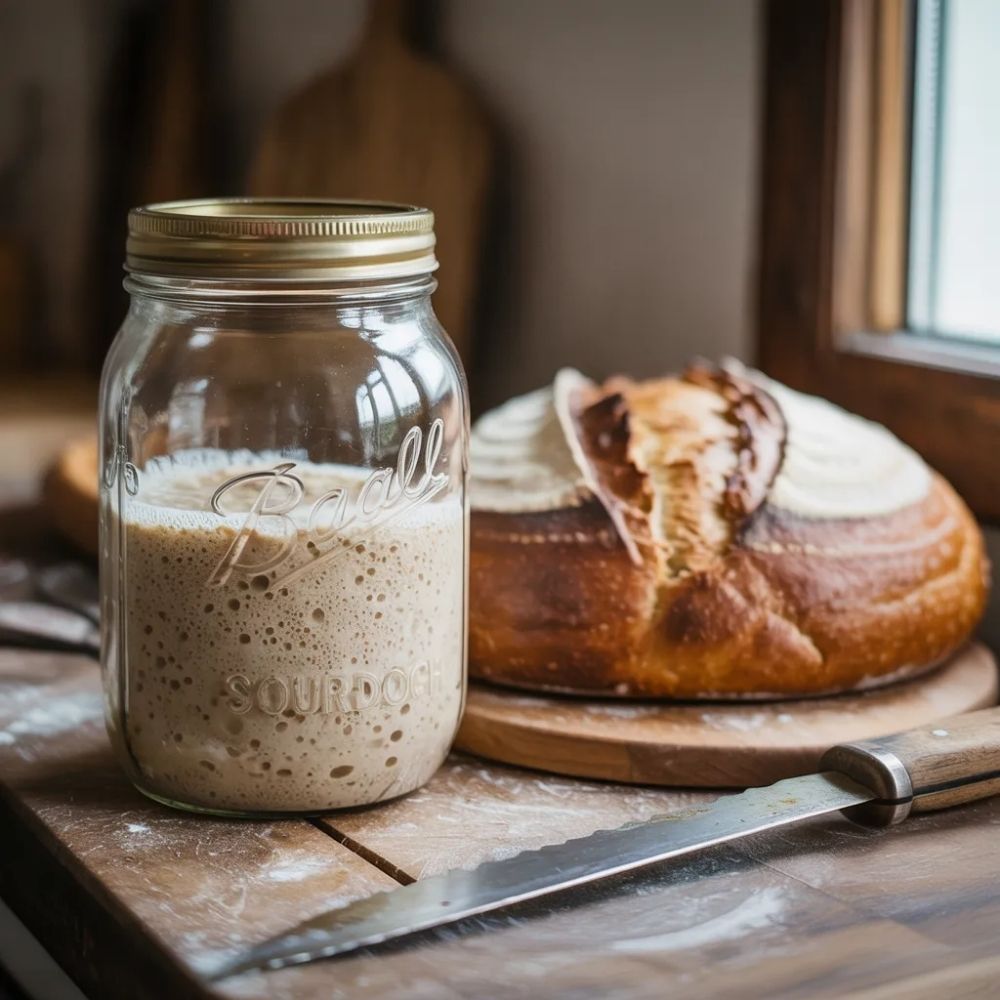
By this stage, your homemade sourdough bread starter should double or triple in total volume within 4 to 6 hours after being fed. The paste will be thoroughly spongy, webbed with tiny air bubbles, and have a highly elastic texture. It is now officially ready to bake a basic sourdough bread loaf or can be used to mix pizza dough from sourdough starter recipes.
Maintenance, Storage, and Feeding Workflows
Once you have completed starting sourdough starter protocols, you can adapt your feeding sourdough starter routines to fit your weekly lifestyle and baking frequency.
Room Temperature Countertop Maintenance: If you plan on making sourdough loaves multiple times a week, keep the jar on your counter. It must be fed every 24 hours using the 1:1:1 weight formula to keep the yeast fully active.
The Long-Term Refrigerator Strategy: If you only bake occasionally, feed your starter, let it sit on the counter for 1 hour to kickstart activity, then seal the lid tightly and place it in the refrigerator. The cold environment slows the yeast metabolism down into a dormant state. In the fridge, it only requires feeding sour dough steps once every 7 to 10 days.
Baking Prep: When you are ready to transition your cold culture into a bake-ready state for beginner sourdough bread, remove it from the refrigerator 24 hours in advance. Perform two consecutive room-temperature discards and feedings to fully awake and energize the wild yeast colony before mixing your main dough.
Nutritional Breakdown
A sourdough starter consists purely of fermented flour and water. The nutritional transformation happens during fermentation, as the microbes break down the complex carbohydrate chains. A baseline 100-gram serving of active unbleached white flour starter contains approximately the following data:
-
Total Energy Output: 160 Calories (kcal)
-
Protein Content: 5.5 grams (the fermentation process partially pre-digests gluten proteins, making them significantly easier on the human digestive tract)
-
Total Carbohydrates: 32 grams
-
Dietary Fiber: 1.2 grams
-
Sugars: 0 grams (wild yeasts fully consume the simple sugars)
-
-
Total Fat Content: 0.5 grams
-
Sodium Matrix: 0 mg (all salt is added later during the formal dough assembly stage)
-
Glycemic Index Impact: Notably lower than conventional bread starters due to the high presence of residual organic acids.
Frequently Asked Questions (FAQ)
What is the liquid floating on top of my sourdough starter?
The dark, clear, or yellowish liquid that forms on top of a neglected starter is known as hooch. Hooch is simply a natural alcohol byproduct excreted by the wild yeast when it has completely run out of food. It is not dangerous. If you see hooch form, simply pour the liquid off into the sink (or stir it back in for an extra-sour flavor), discard a portion of the paste, and immediately perform a standard flour and water feeding.
How do I tell if I am dealing with a moldy sourdough starter?
A healthy starter can smell like vinegar, alcohol, or yeast, and it can sometimes form a dry, leathery skin if exposed to dry air. However, if you see fuzzy, distinct spots of white, green, black, or pink fuzz growing on the surface or internal walls of your jar, you are dealing with a genuine moldy sourdough starter.
Mold means unwanted fungal spores have compromised the culture. If mold occurs, discard the entire contents immediately, sterilize the glass jar thoroughly with boiling water, and start fresh with clean ingredients.
What is the difference between this and an Amish friendship bread starter?
While both are fermented liquid bases, a standard sourdough starter relies entirely on wild ambient elements with zero added sugars. Conversely, an amish bread starter or amish friendship bread starter is a sweet, milk-and-sugar-based culture that often utilizes a packet of commercial active dry yeast to kickstart fermentation. An friendship bread starter yields a sweet, cake-like batter rather than a rustic, artisan bread dough.
My starter isn’t rising, how do I go about reviving a sourdough starter?
If your culture seems sluggish or completely flat after a week, it usually means the ambient temperature is too cold or the water contained trace chemicals.
For reviving a sourdough starter, try these steps: switch to bottled spring water, use whole rye flour for one or two feedings to provide an intense shot of nutrients, and place the jar inside a turned-off kitchen oven with only the internal oven light turned on. The ambient heat from a simple lightbulb creates an ideal 78°F microclimate that accelerates yeast reproduction.
Do I really have to discard half the starter at every single feeding?
Yes, throwing away a portion of the paste is mathematically required to keep your culture alive and healthy. If you do not discard a portion before adding fresh flour and water, the total volume of your starter will grow exponentially within days.
This would require pounds of fresh flour at every feeding just to keep the massive yeast population fed. If you want to avoid waste, look up recipes for sourdough discard, which allow you to use the unfed discard to make pancakes, crackers, or waffles.
Sourdough Starter
Print ThisIngredients
- A Clean Glass Jar: A 1-quart wide-mouth Mason jar or a glass Weck jar is perfect. Avoid using airtight plastic containers, as gas pressure needs to escape.
- A Digital Kitchen Scale: Fermentation requires precise mass measurements. Measuring flour by volume (cups) is highly inaccurate due to packing densities.
- A Stirring Utensil: A small silicone spatula or a wooden spoon.
- A Rubber Band: Placed around the outside of the jar to track the physical rise of the sourdough dough starter.
- Choosing Your Flour and Water
- The Flour: For a fast, resilient culture, use unbleached organic rye flour or whole wheat flour for the initial setup.
- The Water: Use filtered, unchlorinated water at warm room temperature (75°F to 80°F).
Instructions
Day 1: The Initial Blend
Place your glass jar on the digital scale and tare it to zero. Add 50 grams of whole wheat or rye flour and 50 grams of warm filtered water. Stir vigorously with your spatula until no dry flour pockets remain, scraping down the inside walls of the jar.
Day 2: The First Discard and Feed
Open the jar. Discard all but 50 grams of your starter base into the trash. To the remaining 50 grams in the jar, add 50 grams of unbleached all-purpose flour and 50 grams of warm water (a standard 1:1:1 ratio by weight). Stir thoroughly, cover loosely, and rest for 24 hours.
Day 3: Initial Microbial Surge
Repeat the exact feeding ritual: discard down to 50 grams of starter, add 50 grams of all-purpose flour, and 50 grams of water. Snap a rubber band around the jar right at the height of the top of the paste to track movement over the next day.
Days 4 to 6: Steady Fermentation
Repeat the discard and feeding routine at the exact same time every day. The aroma will shift from a sharp, cheesy smell to a pleasant, clean scent reminiscent of fresh yogurt, green apples, or beer. The basic sourdough starter will begin rising and falling in a predictable wave pattern every 12 to 24 hours.
Day 7: A Mature, Active Yeast Culture
By this stage, your homemade sourdough bread starter should double or triple in total volume within 4 to 6 hours after being fed. The paste will be thoroughly spongy, webbed with tiny air bubbles, and have a highly elastic texture.