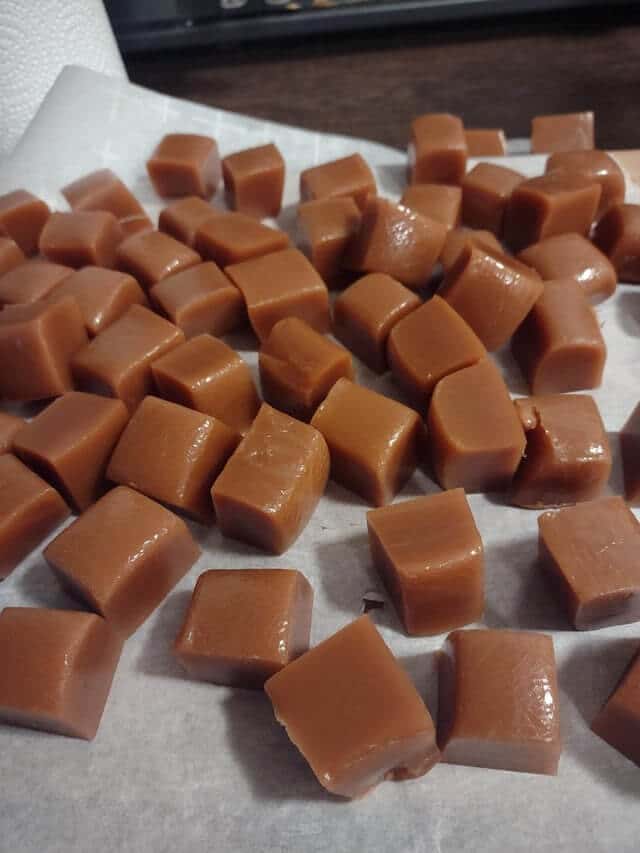
Soft, buttery Homemade Caramels! A tried-and-true recipe you’ll want to make every holiday.
I’ve tried other caramel recipes over the years, but always come back to this one. These are perfectly soft, but not such a soft caramel that they fall apart.
This recipe makes a ton of caramels! I usually make them for my yearly Christmas neighbor gifts. It’s a family tradition to make a batch or two the weeks leading up to Christmas, but you can make them for any holiday.
TO MAKE THESE HOMEMADE CARAMELS, YOU WILL NEED
Sugar: It’s important to use white granulated sugar to create the best rich caramel flavor. No other type of sugar will work! I like Domino brand best.
Butter: Use unsalted, real butter for this delicious caramel recipe. (You’ll be adding in salt later.)
Corn syrup: For the best caramels, use light corn syrup (not dark corn syrup).
Salt: Kosher sea salt is best for this recipe — it gives the best texture and flavor!
Evaporated milk: Evaporated milk helps give these soft chewy caramels a creamy, smooth texture.
See the recipe card for full information on ingredients and quantities.
HOW DO YOU MAKE HOMEMADE CARAMELS?
Start by adding sugar, syrup and salt in a large saucepan over medium heat. Stir until mixture is boiling and sugar has dissolved. Slowly mix in the cream and keep stirring (don’t let it stop boiling).
Then mix in the butter and stir it into the mixture. Keep mixture at a boil for about 15-20 minutes, stirring constantly.
Keep a close eye on the temperature to see when it reaches the soft ball stage. Once it reaches 245°F immediately remove from heat and pour into a buttered 9×13″ baking dish.
Allow the caramel to sit on the counter until it hardens (preferably overnight).
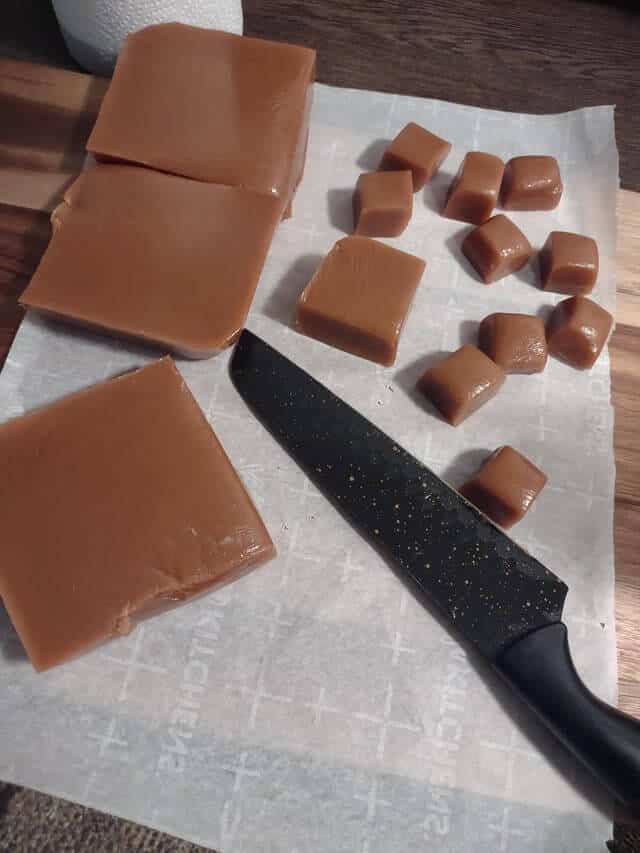
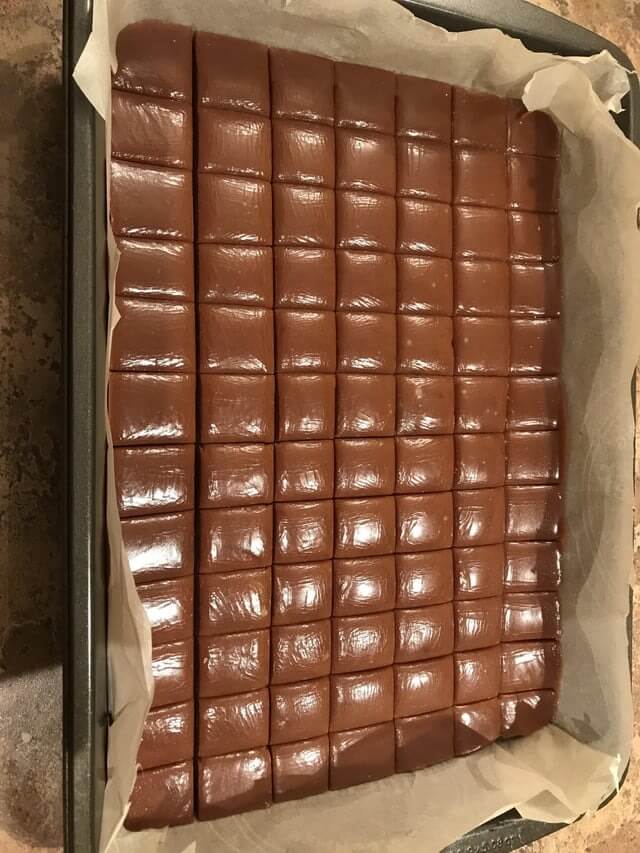
Once the caramel has set, use a buttered or plastic or sharp knife and begin cutting. For a rectangular shape, cut into 12 vertical rows and then cut 4 caramels from each row.
Using wax paper or cellophane, cut into 3×6-inch squares and wrap each piece inside.
RECIPE NOTES AND HELPFUL TIPS:
Be generous when buttering your pan. The last thing you want is to finish the recipe and have half of your caramels stuck to the baking dish!
Stir continually. You will definitely get your arm workout in while you make this recipe! It’s important to stir constantly so your caramel doesn’t burn or get stuck to the pan.
Have a candy thermometer on hand. You want the mix to get to 245°F before it’s removed from heat. Don’t let it get any hotter than this or it will burn!
Test to see if the caramel is done. Even with a candy thermometer on hand, you’ll want to make sure the soft caramel mixture is ready. To do so, scoop out a teaspoon of the mixture from the pan, then drop it into a glass of ice water. If it forms a soft ball, it’s done. If not, keep it on the heat for another minute or so, then try again.
ESTIMATE NUTRITIONAL INFORMATION:
Yield: 80 | Serving size: 3
Calories: 450kcal | Total Fat: 21g | Cholesterol: 55mg | Sodium: 350mg | Total Carbohydrates: 61g | Sugar: 43g | Protein: 6g | Calcium: 109mg | Iron: 1.3mg | Potassium: 106mg | Fiber: 1g | Vitamin A: 289IU | Vitamin C: 10mg
FREQUENTLY ASKED QUESTIONS (FQAs):
How can I prevent my homemade caramels from sticking to the pan?
To prevent homemade caramels from sticking to the pan, it’s essential to use a clean, heavy-bottomed saucepan and butter it or use parchment paper to line the pan before pouring the caramel mixture. This will make it easier to remove the caramels once they’ve cooled and set.
What’s the best way to cut homemade caramels into neat pieces?
For clean and even cuts, use a sharp knife that has been lightly greased with cooking spray or oil. This will help the knife glide through the caramel without sticking. Alternatively, you can use kitchen shears for square-shaped caramels.
Can I make caramels without a candy thermometer?
While a candy thermometer provides precise temperature control, you can make caramels without one. Use the cold water test: drop a small amount of the caramel mixture into a glass of cold water, and it should form a soft ball that you can squish between your fingers. This stage corresponds to the “soft ball” temperature on a candy thermometer.
How can I store homemade caramels to keep them fresh?
Store homemade caramels in an airtight container at room temperature. Layer the caramels with wax paper or parchment paper to prevent sticking. Properly stored, homemade caramels can remain fresh for several weeks.
Can I customize the flavor of homemade caramels?
Yes, you can customize homemade caramels by adding various flavorings. Popular options include vanilla extract, sea salt, or flavored liqueurs. Be sure to add these flavorings after removing the caramel mixture from the heat.
Why did my caramel turn grainy or crystallize?
Caramel can become grainy or crystallize if sugar crystals form during the cooking process. To prevent this, use a clean saucepan, avoid stirring once the mixture boils, and wash down the sides of the pan with a wet pastry brush to dissolve any sugar crystals.
How do I make caramels softer or firmer?
The texture of your caramels depends on the cooking temperature and duration. Cooking the mixture to a lower temperature will result in softer caramels, while higher temperatures will produce firmer caramels. Use a candy thermometer for precise control.
Can I use light or dark corn syrup in caramel recipes?
Both light and dark corn syrup can be used in caramel recipes, depending on your preference. Light corn syrup creates a milder caramel flavor, while dark corn syrup adds a deeper, more robust taste.
What should I do if my caramel is too hard or too soft?
If your caramel turns out too hard, it may have been cooked to a higher temperature than desired. To soften it, warm it gently in the microwave or on the stovetop. If it’s too soft, you can reheat it and cook it for a bit longer to reach your desired consistency.
How can I use homemade caramels in other recipes?
You can incorporate homemade caramels into various recipes, such as caramel-filled chocolates, caramel apple desserts, or drizzled over ice cream or baked goods. Get creative and enjoy the sweet, caramel goodness in different culinary creations.
Let’s Make These Chewy Buttery Homemade Caramels!
And there you have it – these chewy, buttery Homemade Caramels are ready to take theirs place on your table. If you decide to give it a shot, make sure to snap a photo and share it with us on Facebook and Pinterest.
Be sure to follow us for more yummy recipes in the future. Until next time, happy cooking!

Ingredients
- 4 cups sugar
- 2 sticks butter 1 cup
- 2 cups white corn syrup
- 1 teaspoon Kosher salt
- 2 12 oz. cans evaporated milk
Instructions
Line a 9×13 pan with parchment paper and set aside.
Melt the sugar, butter, corn syrup, and salt together in a large, heavy-bottomed pot over medium heat. (A stainless steel pot works best for these caramels.)
Once the mixture comes to a boil, add the evaporated milk a little at a time, taking 10-15 minutes per can and stirring constantly. A labor of love indeed.
Once all the milk is added use a candy thermometer and bring the mixture to 238F-240F and not any hotter! Even a few degrees hotter will make them chewy instead of soft. (This will take another 15 minutes or so!) I highly recommend double checking the temperature with an instant read thermometer as it comes to temperature.
Immediately pour into the prepared pan and cool completely. (Once the caramels are cool – I recommend freezing them for 20-30 minutes before slicing. Or you can refrigerate them for a few hours. You don’t want them to be frozen solid, but if they’re cold this helps the caramels hold their shape when cutting/wrapping.) Cut and serve. Enjoy!

