In a winter of years ago, when my grandson visited during a snowstorm that kept us homebound for days, we decided to trade our usual cookie-baking afternoon for something a little more cosmic.
He’s got this fascination with outer space—the moon, the stars, black holes—and I had promised we’d do a craft project that didn’t involve a screen or batteries. That’s how we stumbled into what I now call one of my most unexpectedly delightful kitchen adventures: DIY Moon Rocks.
We gathered up ingredients that are usually reserved for baking pies and making playdough, and before long, our hands were covered in a glowing, squishy mix that smelled faintly of school glue and brought out belly laughs neither of us expected. It reminded me of the science fairs back in the 1970s when I was a young teacher helping third graders create volcanoes out of baking soda and vinegar—simple ingredients, pure joy.
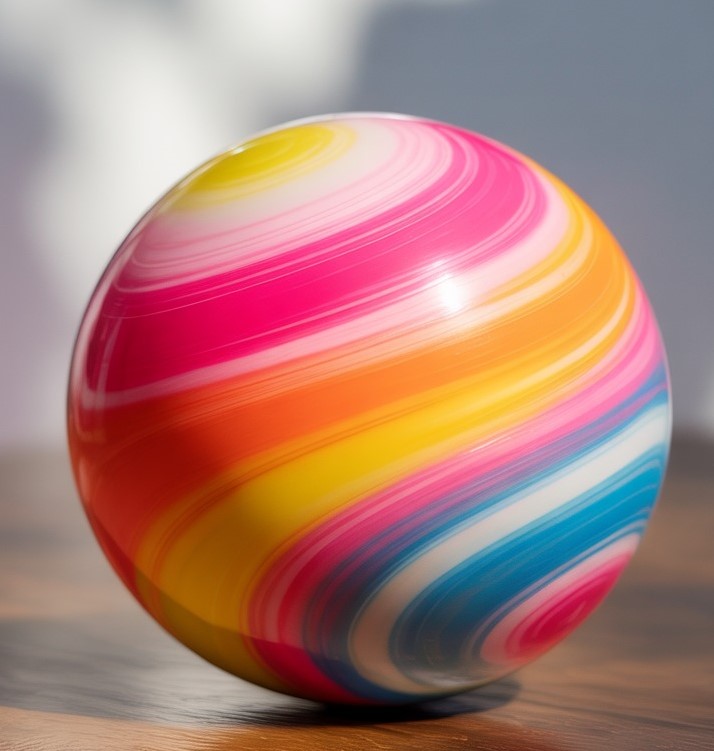
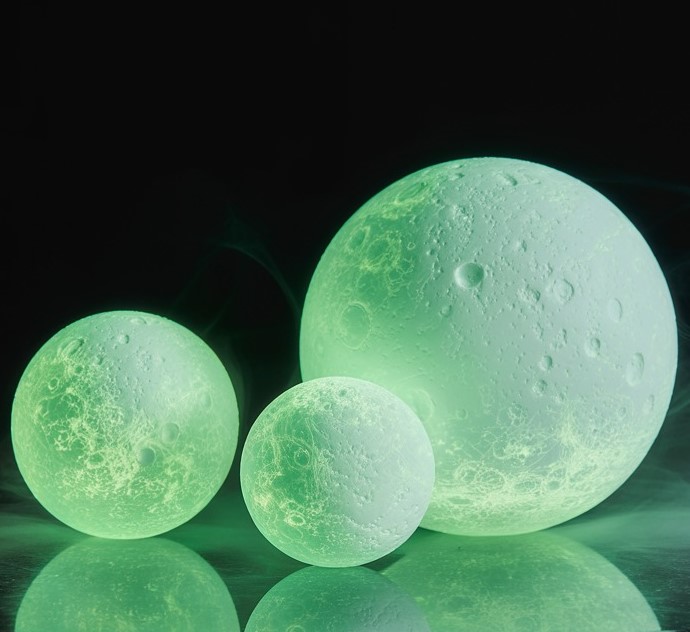
As the rocks dried and we flicked off the lights to see their eerie glow, his eyes lit up in wonder. We bounced a few off the kitchen floor just to test how tough they were (yes, one hit the dog’s tail—don’t worry, the dog was unimpressed and unharmed). I never thought a bowl of baking soda and glue could turn into a memory, but it did. So, this one’s for you, fellow makers, teachers, and weekend crafters: a playful, hands-on recipe that lights up more than just your kitchen counter.
Short Description
DIY Moon Rocks are a fun, glow-in-the-dark project using simple pantry staples like baking soda, cornstarch, and glue. These otherworldly creations are perfect for kids, science lovers, and anyone looking for a crafty way to spend an afternoon.
Key Ingredients
- 1 cup baking soda
- ½ cup cornstarch
- ¼ cup white glue
- ¼ cup water
- 1 tablespoon glow-in-the-dark paint or glow powder
Tools Needed
- Large mixing bowl
- Mixing spoon or spatula
- Baking tray or parchment paper
- Plastic gloves (optional, especially for kids)
- Plastic or rubber ball (optional, for bounce testing)
Cooking Instructions
Step 1: Mix Baking Soda and Cornstarch
In a large mixing bowl, stir together 1 cup of baking soda and ½ cup of cornstarch. This blend creates the gritty, lunar texture that gives your moon rocks their realistic appearance.
Step 2: Add Glue and Water
Pour ¼ cup of white glue into the dry mix. Follow with ¼ cup of water. Stir thoroughly until a dough begins to form. The texture should be thick, moldable, and slightly sticky—like homemade playdough.
If it feels too dry and crumbly, add a teaspoon of water at a time. Too wet? Sprinkle in equal parts baking soda and cornstarch to balance it.
Step 3: Add Glow-in-the-Dark Paint
Scoop in 1 tablespoon of glow-in-the-dark paint or glow powder. Mix well until the entire dough is evenly tinted. For stronger glow effects, make sure the paint is well-distributed and not just sitting in streaks.
Step 4: Shape the Moon Rocks
Take small handfuls of dough and roll them into uneven, lumpy shapes—like real rocks you’d find on a gravel road. Aim for marble-sized to golf ball-sized pieces.
Step 5: Dry the Moon Rocks
Line a baking tray with parchment paper and arrange your moon rocks in a single layer. Let them air-dry for at least 8 hours, preferably overnight. In a rush? Bake them at 200°F for 30–45 minutes.
Why You’ll Love This Recipe
– Fun for all ages—great bonding activity with kids
– Uses basic household ingredients
– Mess-free cleanup (especially with gloves)
– They glow in the dark—what’s not to love?
– Encourages creativity and hands-on learning
– Can double as an educational science project
– Flexible drying method: air or oven
– Makes a great party or classroom activity
– No fancy equipment needed
– Surprisingly therapeutic to knead and shape
Mistakes to Avoid & Solutions
Too Wet or Runny Dough: This usually means too much water. Add 1 tbsp of baking soda and 1 tbsp cornstarch, mix, and reassess.
Paint Doesn’t Glow Well: Not all glow-in-the-dark paints are strong. Use concentrated glow powder for better results or let your paint “charge” under a lamp.
Rocks Cracking While Drying: If your dough is too dry or shaped too tightly, cracks can form. Keep the dough slightly pliable and don’t overpack it.
Stickiness During Shaping: Lightly coat your hands with cornstarch or wear gloves. This makes molding smoother.
Inconsistent Texture: Make sure to mix thoroughly before shaping. Unmixed glue or dry patches will affect drying and final appearance.
Serving and Pairing Suggestions
Though not edible, moon rocks make an imaginative addition to:
– Outer space-themed birthday parties
– Classroom experiments or science fairs
– DIY kits for gifting or party favors
– Sleepover craft stations
– Decorative jars in kids’ rooms
For extra fun, bounce them lightly like rubber balls, hide them in moon-themed scavenger hunts, or store in glow jars for nighttime play.
Storage and Reheating Tips
Store in a dry, airtight container to prevent moisture reactivating the dough
Keep away from sunlight to preserve the glow pigment
Do not refrigerate — condensation may soften them
To reactivate glow, expose rocks to strong light (sunlight or a UV lamp)
Avoid high humidity, which can weaken the structure over time
FAQs
1. Can I make these without glow-in-the-dark paint?
Yes, but they won’t glow. You can use food coloring for color instead, or add glitter for sparkle.
2. Are moon rocks safe for toddlers?
They’re non-toxic if made with kid-safe glue and paint, but not edible. Supervise young children during play.
3. Can I use school glue instead of white glue?
Absolutely! Most white school glues work perfectly for this.
4. How long do the moon rocks last?
If stored properly in a dry container, they’ll last several weeks, even months.
5. Can I bake them longer for a harder finish?
Yes, but watch closely. Too long or high heat may cause cracks or discoloration.
Tips & Tricks
Use a UV flashlight to really show off the glow.
Add a few drops of essential oil for scented moon rocks (lavender or lemon work well).
Mix different glow paint colors for a galactic effect.
Roll finished rocks in glow powder for an extra luminous coating.
Let kids create “crater holes” with toothpicks for added realism.
Recipe Variations
1. Scented Galaxy Rocks
Add 5–6 drops of lavender or eucalyptus essential oil during mixing. The calming scent makes them perfect for sensory play or stress relief jars.
2. Color-Changing Moon Rocks
Use color-changing glow paint and layer different hues while mixing. As the rocks dry, they take on shifting tones—especially under UV light.
3. Magnetic Meteorites
Add a teaspoon of iron filings (used in science kits) and embed a small magnet. Kids can then move the rocks with a magnetic wand!
4. Edible Moon Rocks (Candy Version)
Swap out the ingredients entirely: use marshmallows, powdered sugar, and edible glitter. Roll into balls and let dry. These won’t glow, but they’ll be fun for a treat-themed party.
5. Bounce-Tested Moon Rocks
Make your rocks slightly smaller and test how bouncy they are by adding a bit more glue and a dash of rubbery texture (try mixing in a small squirt of liquid starch). Not guaranteed to bounce high, but fun to experiment with!
Final Thoughts
I’ve always believed that creativity and a pinch of curiosity can turn an ordinary day into a memory. Making DIY Moon Rocks reminded me that joy isn’t reserved for big moments—it hides in squishy dough, glowing paint, and the simple wonder on a child’s face. This isn’t just a recipe—it’s a reminder to play, to laugh, and to let go of expectations.
I hope this project brings as much light to your home as it did to mine, quite literally. Whether you’re crafting with kids, students, or just need a break from adulting, I promise you’ll find a little magic in the making. So next time your kitchen feels too quiet or the day needs a spark, whip up a batch of glowing moon rocks—and watch the night come alive.
DIY Moon Rocks
Print ThisIngredients
- 1 cup baking soda
- ½ cup cornstarch
- ¼ cup white glue
- ¼ cup water
- 1 tablespoon glow-in-the-dark paint or glow powder
Instructions
Step 1: Mix Baking Soda and Cornstarch
In a large bowl, combine 1 cup baking soda and ½ cup cornstarch. This forms the gritty base for your moon rocks.
Step 2: Add Glue and Water
Add ¼ cup white glue and ¼ cup water. Mix until a thick, moldable dough forms. If it’s too dry, add water a teaspoon at a time. Too wet? Add a bit more baking soda and cornstarch.
Step 3: Add Glow-in-the-Dark Paint
Mix in 1 tablespoon of glow-in-the-dark paint or powder until evenly blended. A uniform glow means better results in the dark.
Step 4: Shape the Moon Rocks
Shape the dough into rough, uneven balls—marble to golf ball size—for a natural, rocky look.
Step 5: Dry the Moon Rocks
Place them on parchment-lined trays. Air-dry for 8 hours or overnight. For faster results, bake at 200°F for 30–45 minutes.