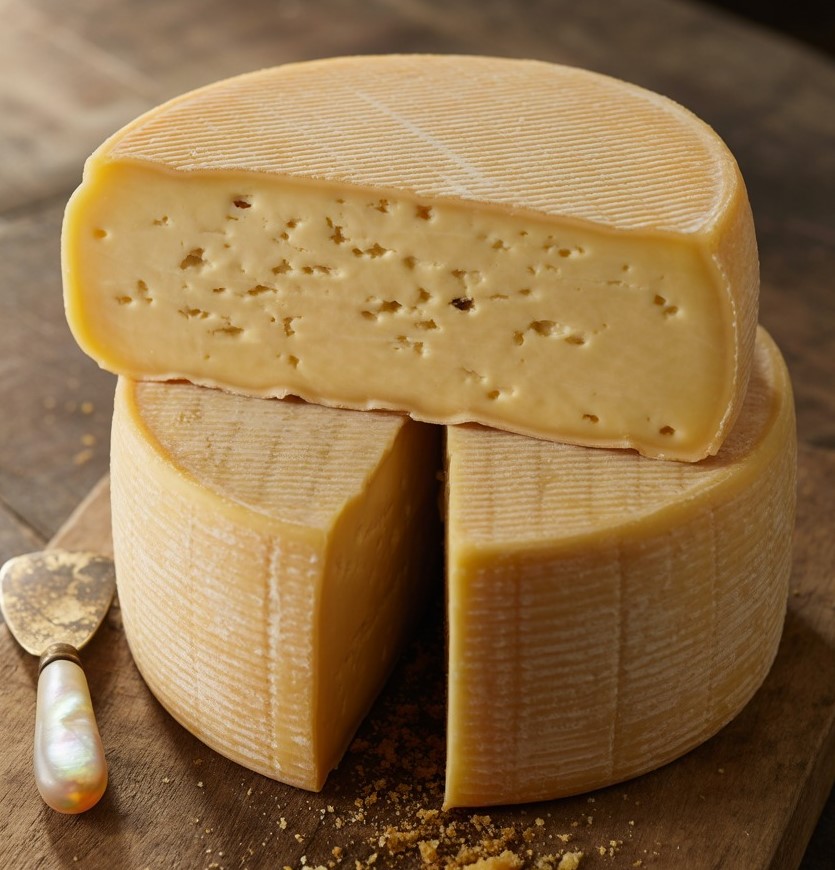
One quiet morning not too long ago, I stood by my kitchen window, cradling a warm mug of tea, listening to the distant sound of birdsong. The sun had just begun to spill over the garden fence, and I thought, “Why not make cheese today?” Not store-bought. Not anything fancy. Just real, fresh cheese—made with nothing more than milk, a touch of acid, and some patience.
It reminded me of my grandmother, who kept a large enamel pot just for cheese-making. I used to watch her stir the milk gently, humming a tune older than both of us.
She believed in using what she had—no preservatives, no shortcuts. Her cheese wasn’t just food; it was comfort. It found its way onto toast in the mornings, into fluffy potato dumplings by noon, and as a creamy spread on warm flatbread by evening. I hadn’t made it in years, but something about that quiet morning called me back. I wanted to recreate the gentle process, the soft texture, and the sense of calm it always brought.
So I did. And now, I want to share it with you—not just the recipe, but the joy that comes with it. This homemade cheese is perfect for those who love simplicity, cherish tradition, and crave the satisfaction of making something from scratch.

Short Description
A soft, mild, and creamy cheese made from just whole milk, lemon juice, and a touch of salt—perfect for spreads, salads, or snacking.
Key Ingredients
- 4 cups (1 liter) whole milk
- 2 tablespoons lemon juice (or white vinegar)
- ½ teaspoon salt
- 10g (2 teaspoons) butter (optional, for creaminess)
- Herbs or spices (optional: garlic, chives, black pepper, etc.)
Tools Needed
- Large saucepan
- Cooking thermometer
- Cheesecloth or clean kitchen towel
- Colander
- Mixing bowl
- Rubber spatula
- Airtight container or plastic wrap
Cooking Instructions
Step 1: Heat the Milk
Pour the milk into a large saucepan and slowly heat it over medium heat. Stir occasionally to prevent the bottom from scorching. When the milk reaches 85°C (185°F)—just before it begins to boil—remove it from the heat.
Step 2: Add Lemon Juice or Vinegar
Stir in the lemon juice or vinegar gently. Within seconds, the milk should begin to separate into soft white curds and a pale yellow whey.
Step 3: Let It Sit
Cover the pot and let the mixture rest undisturbed for 10–15 minutes. This helps the curds firm up and ensures a better yield.
Step 4: Drain the Curds
Line a colander with cheesecloth or a clean towel. Carefully pour the curdled milk through it to drain the whey. Let the curds sit for about 30 minutes for a soft texture, or up to an hour for a firmer cheese.
Step 5: Season and Mix
Transfer the curds to a mixing bowl. Stir in salt and butter for added creaminess. This is also the time to fold in any desired herbs or spices for extra flavor.
Step 6: Shape and Chill
For a soft spreadable cheese, store it in an airtight container and refrigerate.
For a firmer cheese, wrap the curds in cheesecloth, gently squeeze out extra liquid, shape into a log or ball, cover with plastic wrap, and chill for 2–3 hours until set.
Why You’ll Love This Recipe
– Only 3 main ingredients
– Naturally low in preservatives and additives
– Quick to prepare—less than an hour of active time
– Versatile—use in sweet or savory dishes
– Great for lactose-sensitive individuals (much of the lactose is in the whey)
– Perfect for small-batch, mindful cooking
Mistakes to Avoid & Solutions
1. Milk didn’t curdle?
Use fresh lemon juice or vinegar and ensure the milk reached the correct temperature. If needed, add an extra tablespoon of acid.
2. Scorched milk on the bottom?
Always stir gently and avoid high heat. A heavy-bottomed pot helps prevent burning.
3. Too salty or bland cheese?
Start with ½ teaspoon salt. Taste and adjust later when seasoning. You can always add more, but you can’t remove it.
4. Cheese too dry or crumbly?
It drained too long or was squeezed too firmly. Next time, reduce draining time or mix in a little cream or melted butter.
5. Cheese smells too sour?
Don’t overdo the lemon or vinegar. The acidity should curdle, not overpower. Use mild vinegar like white or apple cider.
Serving and Pairing Suggestions
– Spread on warm toast or crackers with a drizzle of honey
– Crumble over salads or roasted vegetables
– Stir into warm pasta or risotto for creaminess
– Serve with olives, nuts, and fruit for a homemade cheese platter
– Pair with herbal tea, white wine, or citrus-infused water
Storage and Reheating Tips
Refrigeration: Store in an airtight container for up to 5 days.
Freezing: Not recommended, as it changes the texture.
Reheating (for mixing into warm dishes): Let sit at room temperature for 20 minutes or stir directly into hot food.
Refreshing soft cheese: Add a teaspoon of milk or cream and stir to bring back moisture.
FAQs
1. What type of milk works best?
Whole milk yields the creamiest cheese, but 2% can work. Avoid ultra-pasteurized milk—it doesn’t curdle well.
2. Can I use lime juice instead of lemon or vinegar?
Yes, but it will give a slightly different flavor. Lemon juice is more traditional and balanced.
3. What can I do with the leftover whey?
Use it in smoothies, soups, or bread dough. It’s high in protein and adds a tangy note.
4. How can I make the cheese firmer?
Let it drain longer and wrap it tightly in cheesecloth. You can also press it lightly with a weight.
5. Can I make this cheese lactose-free?
Use lactose-free milk. The acid still works to separate the curds from the whey.
Tips & Tricks
Add fresh chopped chives or cracked black pepper for flavor right after mixing.
Don’t stir too vigorously after adding acid—gentle handling gives smoother curds.
A splash of cream added before chilling gives a richer taste.
Always taste before adding extra salt or herbs.
Use two layers of cheesecloth for a cleaner drain.
Recipe Variations
1. Garlic Herb Cheese
Add ½ teaspoon garlic powder, 1 tablespoon chopped chives, and a pinch of black pepper when mixing the curds. Chill and serve with toasted baguette slices.
2. Lemon-Zest Sweet Cheese
Omit salt and herbs. Mix in 1 tablespoon honey and ½ teaspoon lemon zest. Perfect as a fruit dip or pancake topping.
3. Spicy Chili Cheese
Stir in ¼ teaspoon chili flakes and ½ teaspoon smoked paprika for a spicy kick. Great for spreading on tortillas or mixing into scrambled eggs.
4. Indian Paneer Style
Skip the butter and herbs. Once formed and pressed, cut the firm cheese into cubes and pan-fry until golden. Use in curries or grain bowls.
Final Thoughts
Cheese-making, in its simplest form, is a small act of magic. One minute you’re stirring warm milk, the next, you’re lifting soft curds that smell faintly sweet and fresh. It’s humbling how just a few ingredients, a bit of heat, and some quiet time can produce something so comforting. I’ve made this cheese countless times, and it never feels routine.
There’s always a different herb to try, a new use for the whey, or a memory that stirs as the curds form. It connects me to my past and invites me to slow down. I hope this recipe does the same for you. Give it a try, and you might just find yourself making it again next weekend, and the weekend after that. Some recipes become traditions all over again.

Ingredients
- 4 cups (1 liter) whole milk
- 2 tablespoons lemon juice (or white vinegar)
- ½ teaspoon salt
- 10g (2 teaspoons) butter (optional, for creaminess)
- Herbs or spices (optional: garlic, chives, black pepper, etc.)
Instructions
Step 1: Heat the Milk
Pour milk into a saucepan and heat over medium, stirring occasionally. Once it reaches 85°C (185°F), remove from heat.
Step 2: Add Lemon Juice or Vinegar
Stir in the lemon juice or vinegar. Curds will begin to separate from the whey within seconds.
Step 3: Let It Sit
Cover the pot and let it rest for 10–15 minutes so the curds can fully form.
Step 4: Drain the Curds
Line a colander with cheesecloth. Pour in the mixture and let it drain for 30 minutes (soft) or up to 1 hour (firm).
Step 5: Season and Mix
Transfer curds to a bowl. Stir in salt and butter, then mix in herbs or spices if using.
Step 6: Shape and Chill
For soft cheese, store in an airtight container. For firmer cheese, wrap in cheesecloth, shape, and refrigerate for 2–3 hours.


