Caramelized onions are one of those humble kitchen upgrades that can completely change a meal. A few sliced onions, a little fat, gentle heat, and patience turn sharp raw onions into something soft, sweet, golden, and deeply savory. The transformation feels almost surprising because the ingredients are so simple, yet the flavor tastes rich enough to belong in a restaurant dish.
The most common problem with caramelized onions is rushing the process. Onions need time to soften, release moisture, and slowly brown without burning. High heat may give fast color, but it often creates bitter edges before the onions have a chance to develop that mellow sweetness. Low, steady heat gives the best result.
This recipe keeps the method clear and approachable. The onions cook slowly until they become silky, jammy, and golden brown, with a warm aroma that fills the kitchen in the best way. They can be added to burgers, sandwiches, pizzas, omelets, soups, pasta, grain bowls, and roasted vegetables.
A small spoonful can make simple food feel layered and thoughtful. Once the technique is learned, caramelized onions become one of the most useful flavor boosters to keep ready in the fridge.
Short Description
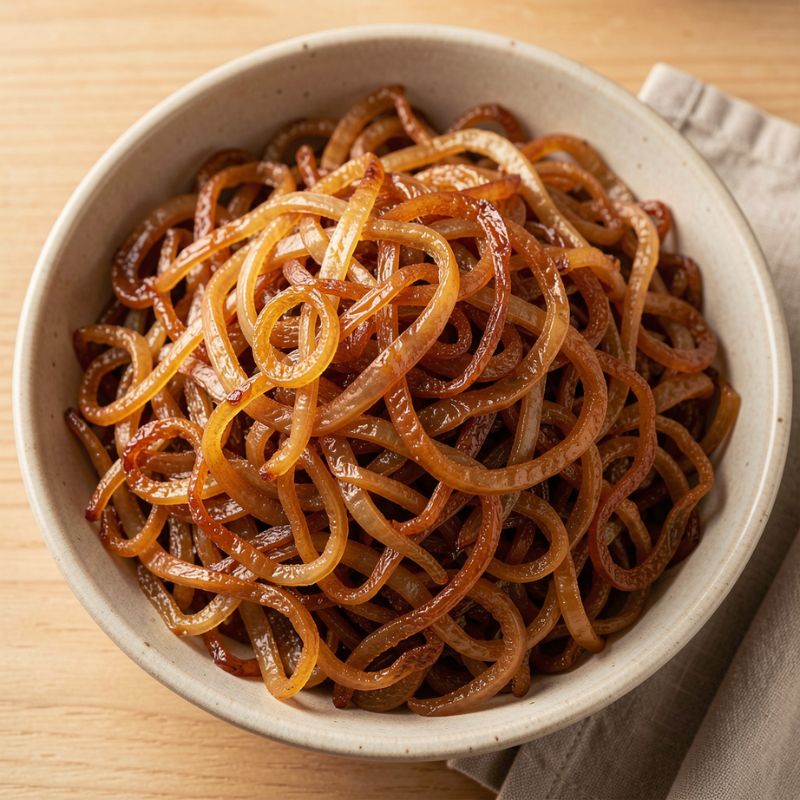
Caramelized onions are slowly cooked onions that turn soft, golden brown, and naturally sweet. This simple recipe creates a rich, savory topping for burgers, sandwiches, soups, pizzas, pasta, eggs, and vegetable dishes.
Key Ingredients
- Yellow onions: 4 large onions, thinly sliced
- Olive oil: 2 tbsp
- Unsalted butter: 1 tbsp
- Salt: ½ tsp
- Water: 2 to 4 tbsp, as needed for deglazing
- Black pepper: ⅛ tsp, optional
- Balsamic vinegar: 1 tsp, optional for extra depth
- Fresh thyme: 1 tsp, optional
Tools Needed
- Large heavy skillet or sauté pan
- Sharp knife
- Cutting board
- Wooden spoon or heat safe spatula
- Measuring spoons
- Small bowl for water
- Airtight container for storage
Cooking Instructions
Step 1: Slice the Onions
Peel 4 large yellow onions and slice them thinly from root to stem. Aim for slices about ⅛ inch thick so they cook evenly. If the slices are too thick, the onions may take longer to soften. If they are too thin, they can burn before they become jammy.
Step 2: Heat the Pan
Place a large heavy skillet over medium heat. Add 2 tbsp olive oil and 1 tbsp unsalted butter. Let the butter melt and foam lightly, about 1 minute. The pan should feel warm, but the butter should not brown too quickly.
Step 3: Add the Onions and Salt
Add the sliced onions to the pan and sprinkle with ½ tsp salt. Stir well so the onions are coated in the oil and butter. The pan may look full at first, but the onions will shrink as they release moisture. Cook for 5 minutes, stirring often, until they begin to soften and turn glossy.
Step 4: Lower the Heat
Reduce the heat to medium low. Continue cooking the onions for 20 minutes, stirring every 3 to 4 minutes. The onions should slowly soften, turn pale golden, and release a sweet aroma. If the edges brown too quickly, lower the heat slightly.
Step 5: Build the Color Slowly
Keep cooking for another 20 to 25 minutes, stirring more often as the onions darken. The color should move from pale gold to deep amber brown. The onions should look soft, silky, and slightly sticky. If browned bits form on the bottom of the pan, add 1 tbsp water and scrape them up with the spoon. Those browned bits add deep flavor.
Step 6: Deglaze as Needed
If the onions start sticking or the pan looks dry, add 1 tbsp water at a time. Stir until the moisture loosens the browned bits and coats the onions. Do not add too much water at once because the onions should sauté, not simmer. This step helps prevent burning while keeping the flavor rich.
Step 7: Finish the Flavor
After 45 to 50 minutes total cooking time, the onions should be soft, golden brown, and jammy. Stir in ⅛ tsp black pepper if desired. For extra depth, add 1 tsp balsamic vinegar and stir for 30 seconds. Fresh thyme can also be added at the end for an earthy aroma.
Step 8: Taste and Serve
Taste the onions and add a small pinch of salt if needed. They should taste sweet, savory, mellow, and rich, with no sharp raw onion bite. Serve warm as a topping, mix into recipes, or cool completely for storage.
Why You’ll Love This Recipe
It turns basic onions into a rich, savory, naturally sweet topping.
The ingredients are simple, affordable, and easy to find.
It works with many dishes, from burgers and sandwiches to soups and pasta.
The recipe is beginner friendly because it uses gentle heat and clear visual cues.
Caramelized onions can be made ahead and stored for quick meals.
They add deep flavor without needing heavy sauces.
This recipe is flexible and easy to season with herbs, vinegar, pepper, or wine.
The texture becomes silky, soft, and almost jam like.
Mistakes to Avoid & Solutions
Cooking the Onions Too Fast
High heat may brown the onions quickly, but it often burns the edges before the inside becomes sweet and tender. The best solution is to cook them over medium low heat after the first few minutes. True caramelized onions need time. If the onions darken in less than 15 minutes, the heat is likely too high.
Using a Pan That Is Too Small
A crowded pan traps steam and slows browning. The onions may soften but stay pale and watery. Use a large skillet so the onions can spread out after they begin shrinking. If cooking a larger batch, use two pans or cook in batches for better texture.
Not Stirring Enough Near the End
At the beginning, onions only need occasional stirring. Near the end, they become stickier and can burn faster. Stir every 1 to 2 minutes once the onions turn golden brown. Scrape the bottom of the pan gently so the browned bits mix back into the onions.
Adding Sugar Too Early
Onions already contain natural sugars, so extra sugar is usually not needed. Adding sugar too early can make the onions burn or taste candy like instead of savory. If a sweeter flavor is desired, add only ½ tsp sugar during the last 10 minutes, but it is optional.
Skipping Deglazing
Browned bits on the bottom of the pan are full of flavor. If they are left too long, they can burn and turn bitter. Add 1 tbsp water whenever the pan looks dry, then scrape up the browned bits. This keeps the onions moist and builds a deeper flavor.
Using the Wrong Onion Type
Yellow onions are the best everyday choice because they balance sweetness and savory depth. Red onions can work but taste slightly sharper and more dramatic. Sweet onions become very soft and mild. White onions are stronger and may need a little extra cooking time to mellow.
Stopping Too Soon
Soft onions are not the same as caramelized onions. They should become deep golden brown, silky, and sweet. If the onions are pale after 20 minutes, keep cooking. The final stage usually takes 40 to 50 minutes total, depending on the pan and heat level.
Serving and Pairing Suggestions
Caramelized onions are wonderful on burgers, grilled cheese, steak sandwiches, turkey melts, and veggie wraps. They add sweetness, softness, and savory depth that makes every bite feel fuller. They also work beautifully on pizza, flatbread, baked potatoes, roasted vegetables, and grain bowls.
For breakfast or brunch, spoon them into omelets, scrambled eggs, breakfast burritos, or avocado toast. For dinner, stir them into pasta, mashed potatoes, risotto, lentils, soups, or pan sauces. They also make a simple appetizer feel special when served over crostini with goat cheese, ricotta, or roasted mushrooms.
For family style serving, place a bowl of warm caramelized onions on the table as a topping for burgers, tacos, baked potatoes, or roasted meats. For a plated meal, use a small spoonful beside grilled chicken, salmon, steak, or stuffed peppers. For a buffet style setup, keep them warm in a small covered dish so guests can add them to sandwiches or savory boards.
Drink pairings can be cozy and simple. Try sparkling water with lemon, iced tea, apple cider, light red wine, or a crisp white wine. The sweet savory flavor of the onions pairs especially well with bright, fresh drinks.
Storage and Reheating Tips
Let the caramelized onions cool completely before storing. Place them in an airtight container and refrigerate for up to 5 days. A shallow container helps them cool faster and makes it easier to scoop out small portions.
For longer storage, freeze caramelized onions in small portions. Spoon them into an ice cube tray, freeze until solid, then transfer the cubes to a freezer safe bag. They can be frozen for up to 3 months. This method makes it easy to add a small amount to soups, sauces, eggs, pasta, or vegetables.
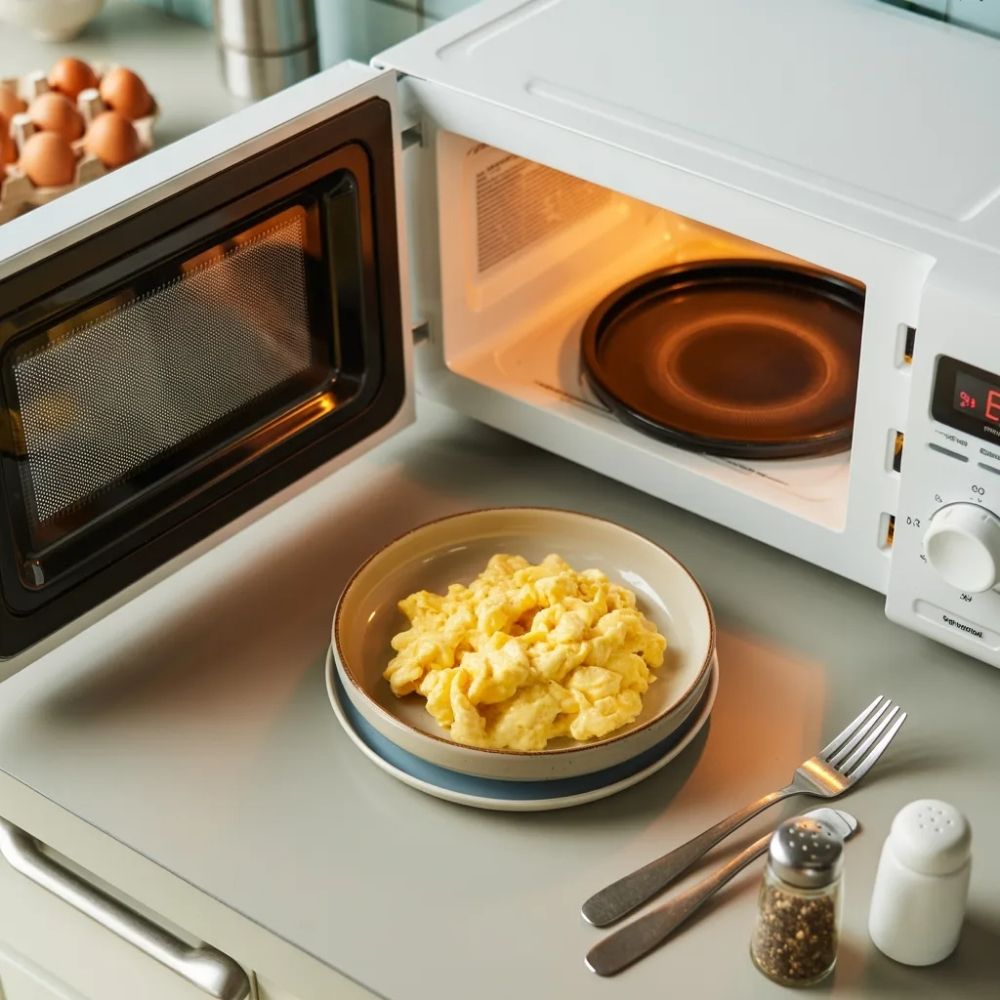
To reheat, place the onions in a skillet over low heat with 1 tsp water or olive oil. Stir for 2 to 4 minutes until warm and glossy. A microwave also works for small portions. Place the onions in a microwave safe bowl, cover loosely, and heat for 20 to 30 seconds at a time, stirring between intervals. Avoid overheating because the sugars can darken and taste bitter.
FAQs
1. How long does it take to caramelize onions?
Caramelized onions usually take 40 to 50 minutes. The exact time depends on the onion type, pan size, and heat level. The onions are ready when they are deep golden brown, soft, sweet, and jammy.
2. Can caramelized onions be made faster?
They can be softened faster, but true caramelization takes time. A little water can help prevent burning and move the process along, but high heat should not be used for the entire recipe. Quick browning often creates burnt flavor instead of deep sweetness.
3. What onions are best for caramelized onions?
Yellow onions are the best all purpose choice. They become sweet, savory, and balanced. Sweet onions are milder and softer. Red onions add a deeper color and slightly sharper flavor. White onions can be used, but they taste stronger.
4. Why are the onions burning instead of caramelizing?
The heat is probably too high, or the pan is too dry. Lower the heat and add 1 tbsp water to loosen the browned bits. Stir more often near the end of cooking. A heavy skillet also helps distribute heat more evenly.
5. Do caramelized onions need sugar?
No, onions contain natural sugars that develop during slow cooking. Sugar is optional and should be used lightly. If added, use only ½ tsp during the last 10 minutes to avoid burning or making the onions too sweet.
6. Can caramelized onions be made with oil instead of butter?
Yes. Use 3 tbsp olive oil instead of the oil and butter combination. The flavor will be slightly lighter and more savory. Butter adds richness, but olive oil works well and keeps the recipe dairy free.
7. Are caramelized onions healthy?
Caramelized onions can fit into a balanced diet when used in moderate amounts. Onions provide flavor, fiber, and plant compounds, while the recipe uses a small amount of fat. They are a smart way to add big flavor without relying on heavy sauces.
Tips & Tricks
Use yellow onions for a balanced sweet savory flavor.
Slice the onions evenly so they cook at the same speed.
Start with medium heat, then lower to medium low.
Use a large heavy pan for better browning.
Stir occasionally at first, then more often near the end.
Deglaze with small splashes of water to prevent burning.
Do not rush the process with high heat.
Add balsamic vinegar at the end for deeper flavor.
Make a double batch and freeze small portions for future meals.
Recipe Variations
Balsamic Caramelized Onions
Use the main recipe, then stir in 1 tbsp balsamic vinegar during the last 3 minutes of cooking. Cook until the vinegar coats the onions and smells sweet and tangy. The flavor becomes deeper, slightly fruity, and perfect for burgers, steak, flatbread, or goat cheese toast.
Herbed Caramelized Onions
Add 1 tsp fresh thyme leaves or 1 tsp chopped rosemary during the last 5 minutes of cooking. Stir gently so the herbs warm through without burning. Thyme gives a soft earthy flavor, while rosemary tastes stronger and more fragrant. This version pairs well with roasted chicken, potatoes, mushrooms, and savory tarts.
Vegan Caramelized Onions
Replace the butter with 1 additional tbsp olive oil. Cook the onions exactly as written. The result is still silky, golden, and rich, but the flavor stays a little lighter. This version works well for plant based burgers, grain bowls, hummus plates, and vegetable sandwiches.
Wine Deglazed Caramelized Onions
Replace 2 tbsp of the deglazing water with dry white wine or red wine during the last 10 minutes of cooking. Stir until the wine reduces and coats the onions. White wine gives a brighter flavor, while red wine adds deeper color and richness. This variation is excellent with steak, mushrooms, and creamy pasta.
Spicy Caramelized Onions
Add ¼ tsp crushed red pepper flakes during the last 5 minutes of cooking. For more heat, add ½ tsp instead. The sweet onions balance the spice beautifully. This version tastes great on tacos, burgers, grilled cheese, eggs, and roasted sweet potatoes.
Maple Caramelized Onions
Add 1 tsp pure maple syrup during the final 5 minutes of cooking. Stir constantly so the syrup blends into the onions without burning. The flavor becomes sweet, warm, and cozy. This version pairs well with pork, roasted squash, breakfast sandwiches, and holiday side dishes.
Mushroom Caramelized Onions
Add 1 cup thinly sliced mushrooms after the onions have cooked for 20 minutes. Continue cooking until the mushrooms release moisture and everything turns golden brown. Add an extra pinch of salt if needed. The flavor becomes earthy, savory, and deeply satisfying for toast, pasta, omelets, or steak.
Conclusion
Caramelized onions show how patience can turn a simple ingredient into something memorable. The process is slow, but it is not difficult, and every minute helps build sweeter, deeper flavor. A pan of onions gradually changes from sharp and pale to soft, golden, and almost jam like. That quiet transformation is what makes this recipe feel so rewarding.
This is also one of the most practical kitchen skills to learn. A spoonful can make sandwiches richer, soups warmer, pizzas more flavorful, and vegetable dishes more satisfying. The recipe uses affordable ingredients, but the final taste feels layered and generous. Keeping a small container in the fridge can make quick meals feel more complete. Once caramelized onions become part of the kitchen routine, they have a way of making simple food taste thoughtful, cozy, and beautifully finished.
Caramelized Onions

Ingredients
- 4 Yellow onions thinly sliced
- 2 tbsp Olive oil
- 1 tbsp Unsalted butter
- ½ tsp Salt
- 2 to 4 tbsp Water as needed for deglazing
- ⅛ tsp Black pepper optional
- 1 tsp Balsamic vinegar optional for extra depth
- 1 tsp Fresh thyme optional
Instructions
- Peel 4 large yellow onions and slice them thinly from root to stem. Aim for slices about ⅛ inch thick so they cook evenly. If the slices are too thick, the onions may take longer to soften. If they are too thin, they can burn before they become jammy.
- Place a large heavy skillet over medium heat. Add 2 tbsp olive oil and 1 tbsp unsalted butter. Let the butter melt and foam lightly, about 1 minute. The pan should feel warm, but the butter should not brown too quickly.
- Add the sliced onions to the pan and sprinkle with ½ tsp salt. Stir well so the onions are coated in the oil and butter. The pan may look full at first, but the onions will shrink as they release moisture. Cook for 5 minutes, stirring often, until they begin to soften and turn glossy.
- Reduce the heat to medium low. Continue cooking the onions for 20 minutes, stirring every 3 to 4 minutes. The onions should slowly soften, turn pale golden, and release a sweet aroma. If the edges brown too quickly, lower the heat slightly.
- Keep cooking for another 20 to 25 minutes, stirring more often as the onions darken. The color should move from pale gold to deep amber brown. The onions should look soft, silky, and slightly sticky. If browned bits form on the bottom of the pan, add 1 tbsp water and scrape them up with the spoon. Those browned bits add deep flavor.
- If the onions start sticking or the pan looks dry, add 1 tbsp water at a time. Stir until the moisture loosens the browned bits and coats the onions. Do not add too much water at once because the onions should sauté, not simmer. This step helps prevent burning while keeping the flavor rich.
- After 45 to 50 minutes total cooking time, the onions should be soft, golden brown, and jammy. Stir in ⅛ tsp black pepper if desired. For extra depth, add 1 tsp balsamic vinegar and stir for 30 seconds. Fresh thyme can also be added at the end for an earthy aroma.
- Taste the onions and add a small pinch of salt if needed. They should taste sweet, savory, mellow, and rich, with no sharp raw onion bite. Serve warm as a topping, mix into recipes, or cool completely for storage.